The most important thing for any one working in a Software job is to have a workflow. No matter which stack you work with, having a good development workflow will help you work efficiently with minimal friction and convert your idea to commit faster. Let’s say you are on a quest to automate the deployment of your microservice in kubernetes. It is very difficult if you rely on your remote aws clusters (Unless your team provides a shared cluster for dev use) that might have many security policies for your local access. Also, if you want to test your service against multiple kubernetes versions or destroy and rebuild it will not be possible. This requires a good local setup to do an end to end development and testing before going to any environment. That is where KinD comes in for kubernetes.
Kind lets you deploy a kubernetes cluster in a local machine just using the docker containers. I.e nodes in your cluster are actually docker containers. There are other tools that help you achieve similar use cases(Minikube, microk8) using virtual VM but I find KinD makes it easier for deployment and at the same time allows a lot of customization for advance deployment as well. It’s a opensource project from Kubernetes SIG .
Installation
Prerequisite for kind is to have to have docker installed locally. Setuping docker is straight forward if you use docker for desktop from here once you have docker installed, on mac KinD is available as a brew package, you can install using the following command. Other installation are listed here
Brew install kind
Single node cluster.
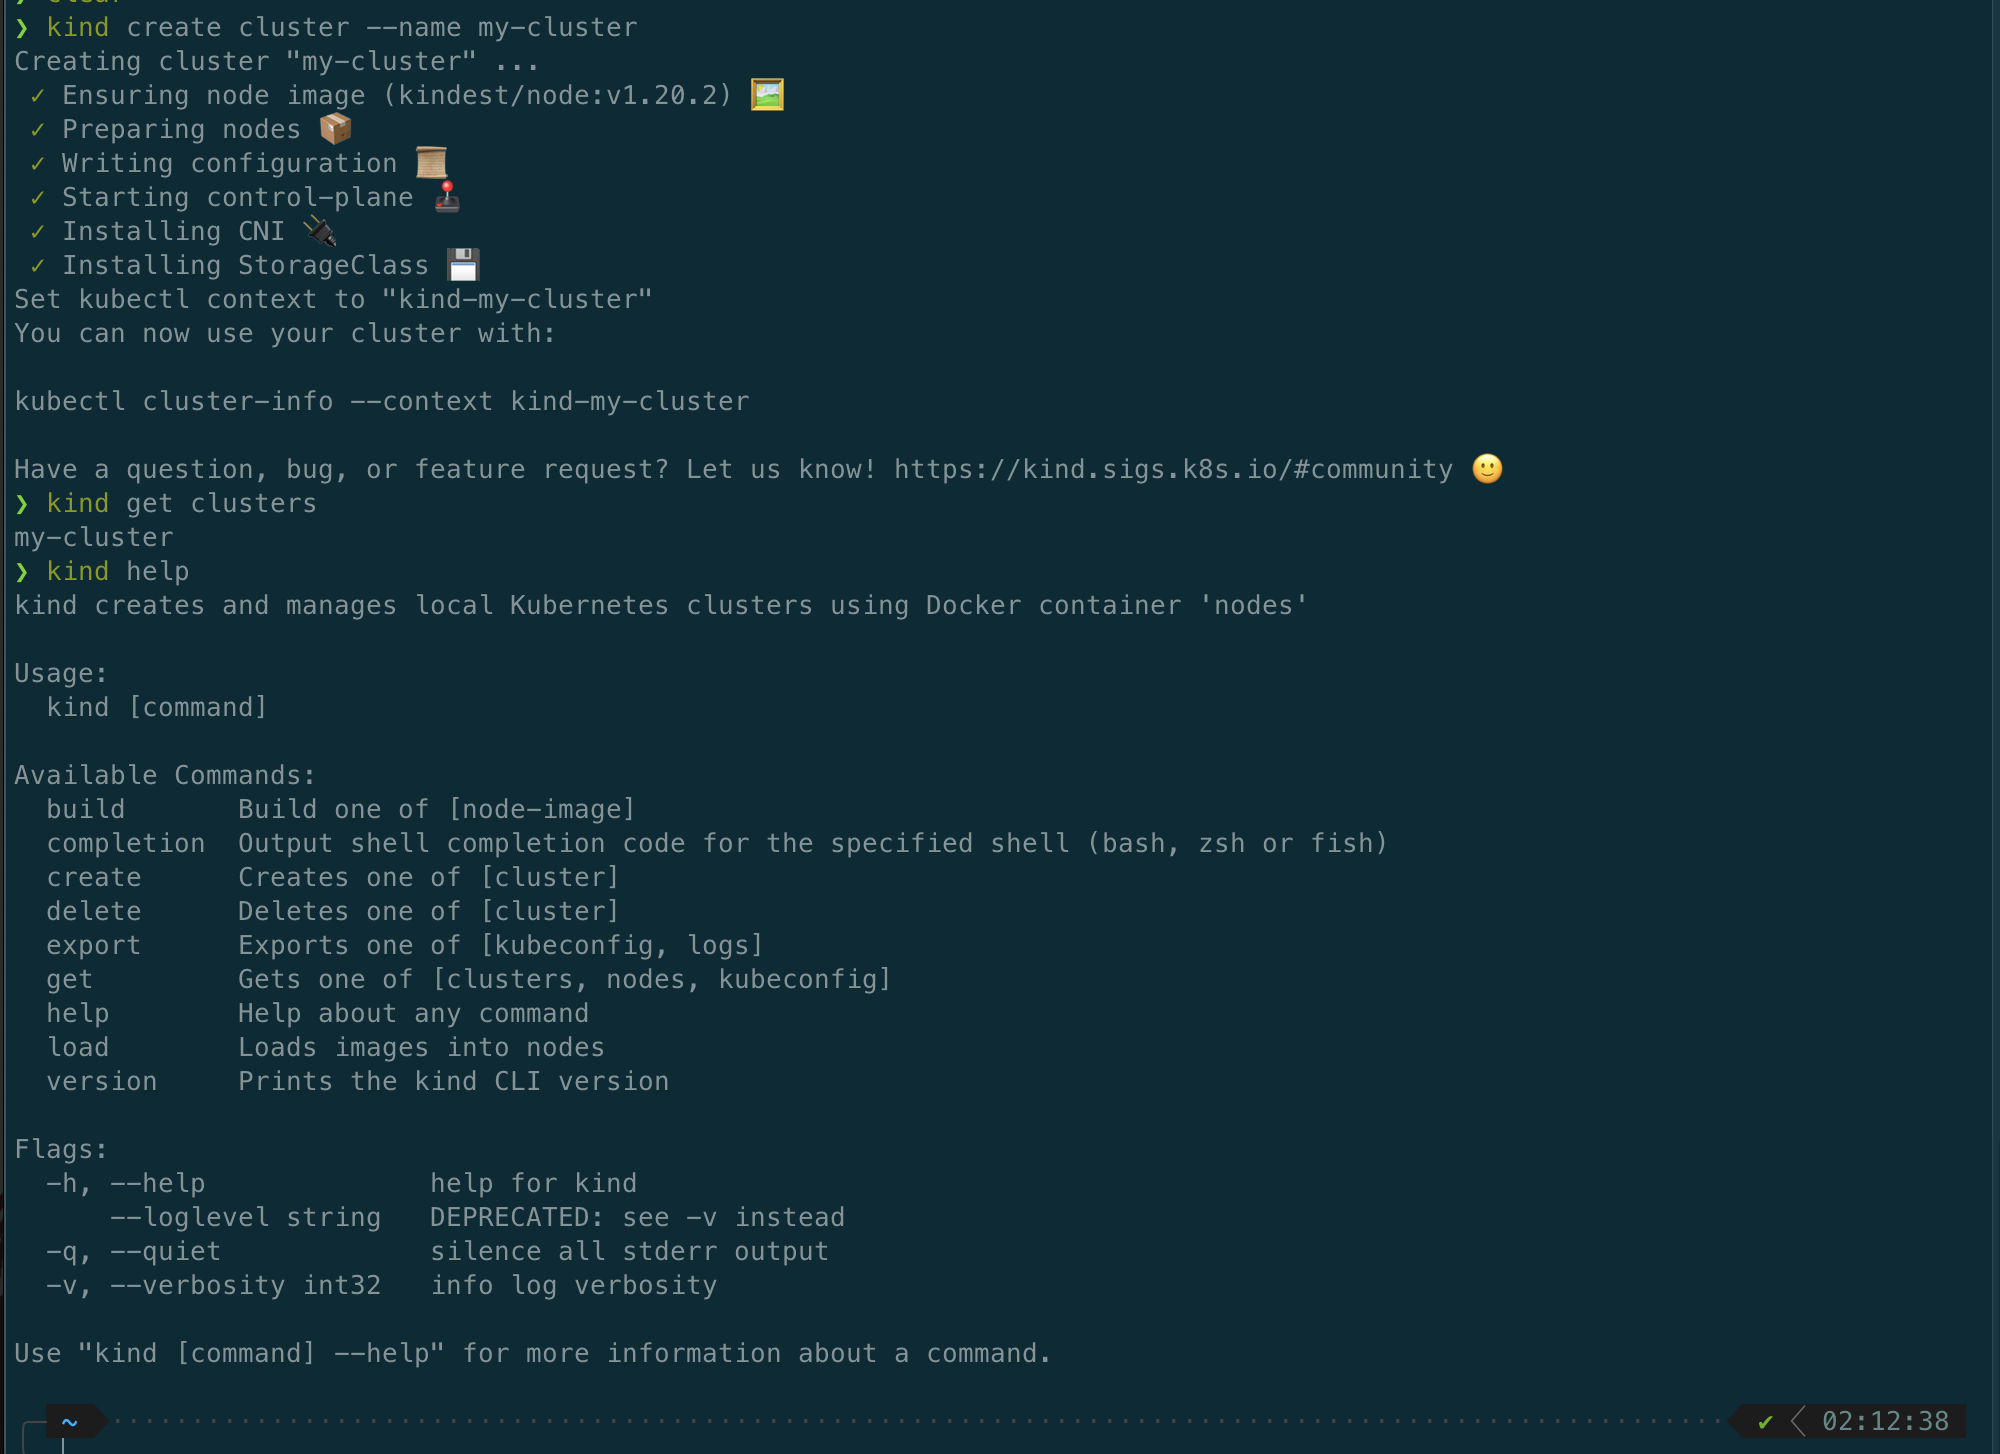
For a simple start , the following command Kind create cluster that will start a single node kubernetes cluster which will have a control-plane as well. Default name for the cluster will be kind , you can optionally pass a name of the cluster if you want.
Kind create cluster --name my-cluster
Kind get cluster - to help get clusters that are available
Kind help

As you can see this will create a single nodes cluster named my-cluster. You can actually do a docker ps to see that Kind run a docker container for this single node.

Multi-Node cluster
You can deploy your service to clusters using kubectl . However this only single node cluster where your control-plane is also installed and some service may not be able to schedule because of node affinity with the control plane. Now let’s see the first cool feature of Kind - deploy a multi node cluster. To deploy node clusters we first create a config file as below. In the below config file you will define the nodes you want in the nodes object with role. This config will create a two nodes cluster , where one is control plane and other is worker node.
kind: Cluster
apiVersion: kind.x-k8s.io/v1alpha4
nodes:
- role: control-plane
- role: worker ```
Kind.config
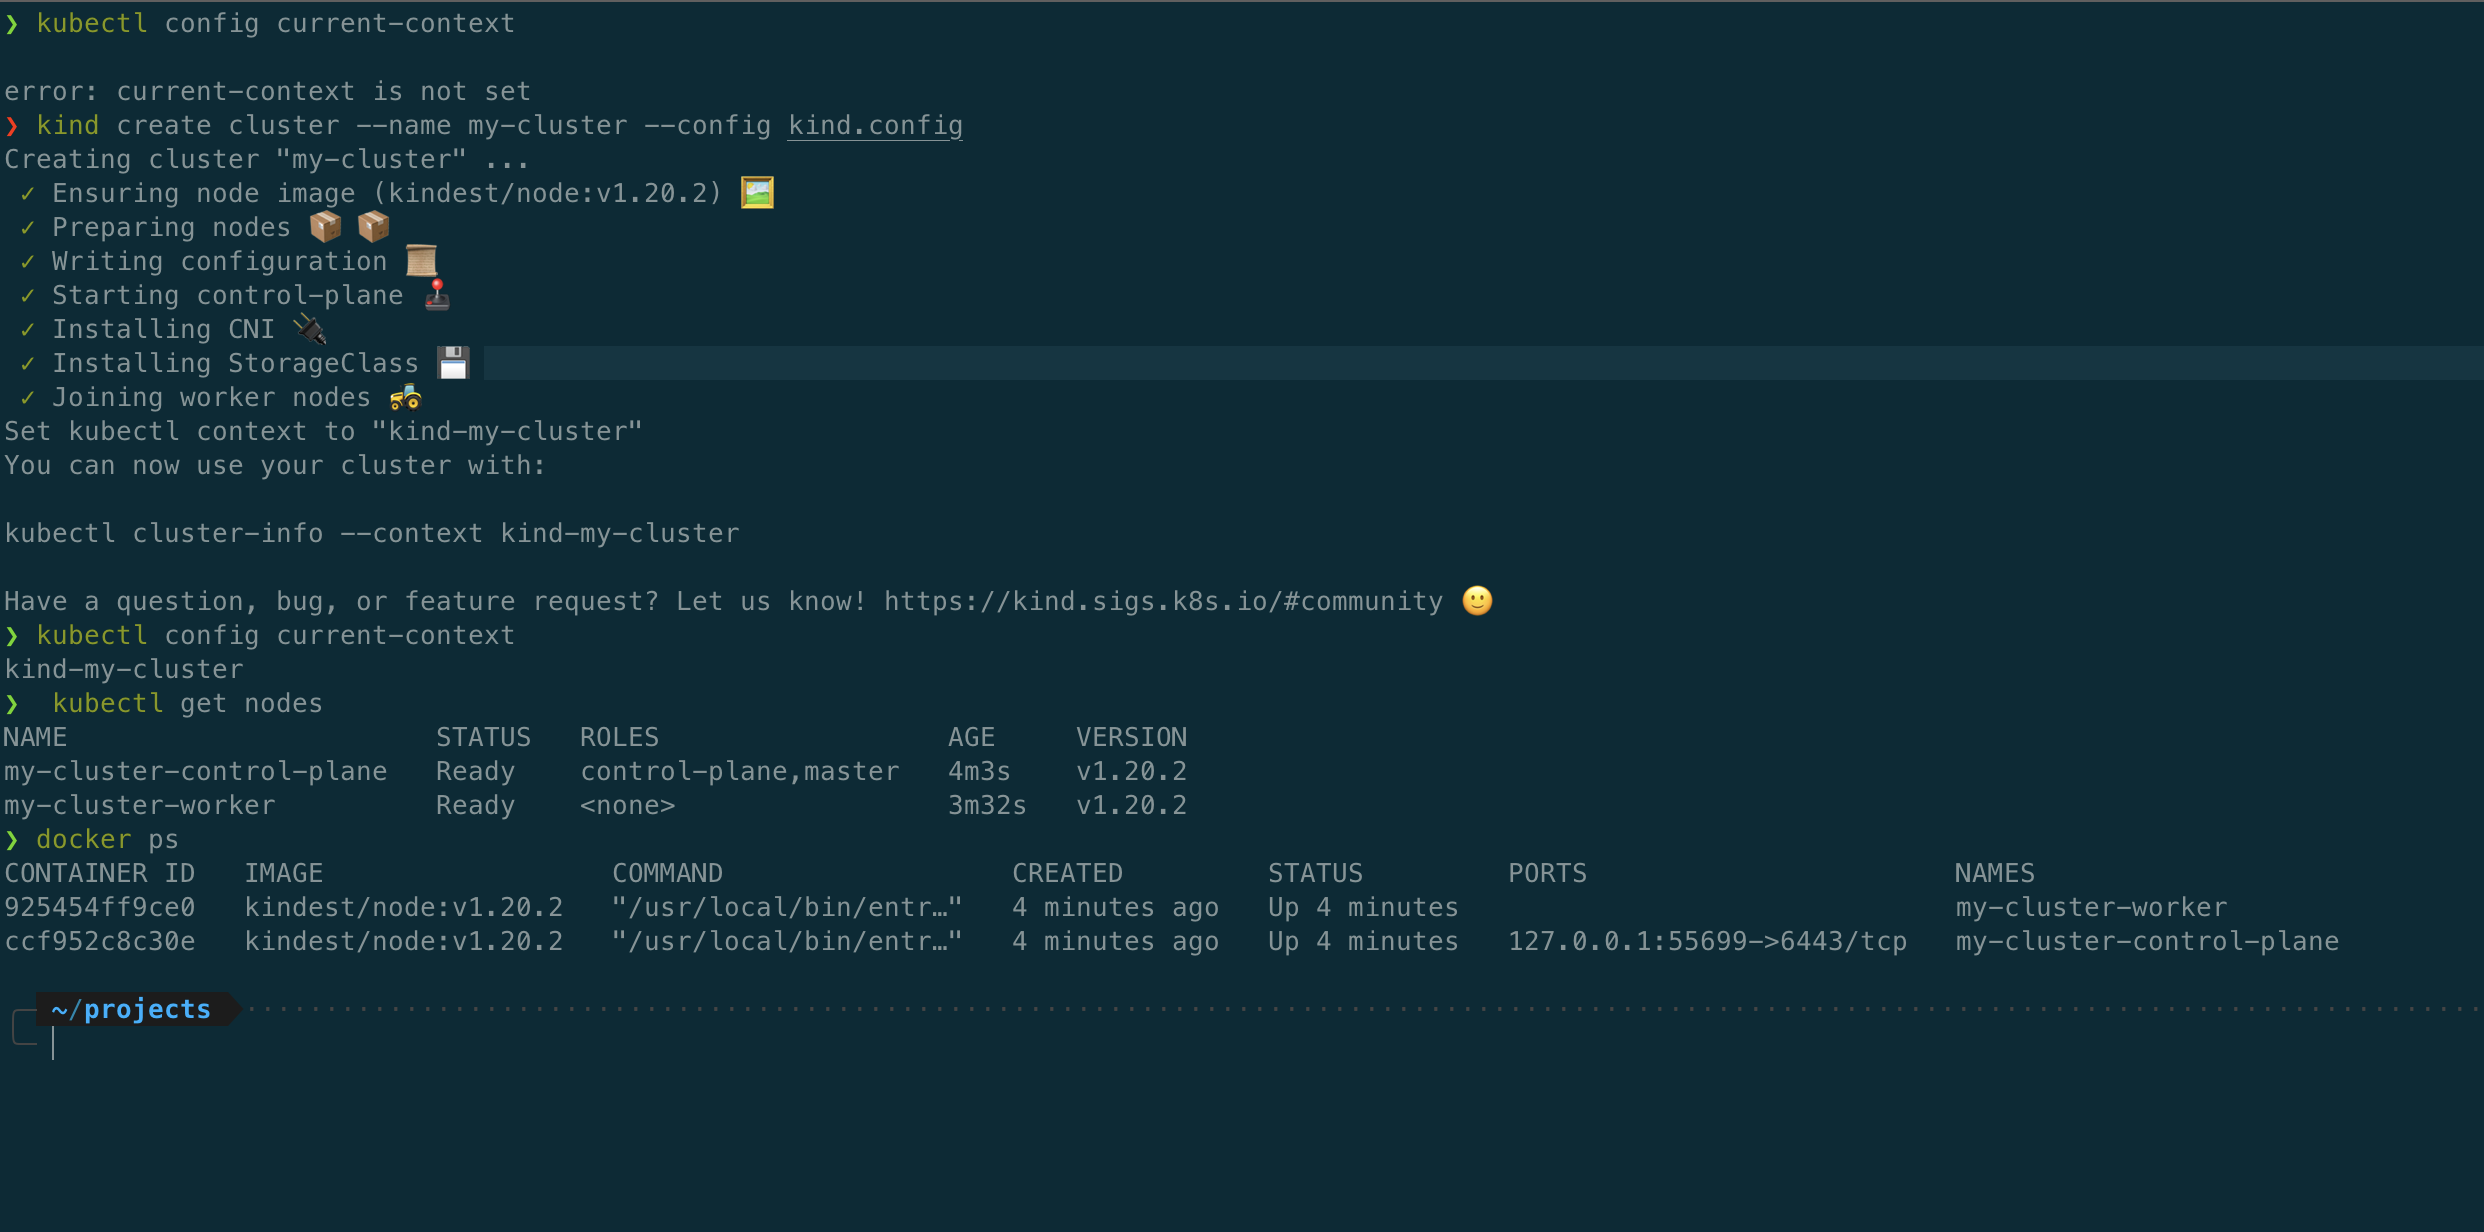
Following command will create the cluster kind create cluster --name my-cluster --config kind.config . Once kind is done, you can check for the nodes using docker ps or the kind get clusters. Another cool feature is when you create a cluster, kind will automatically set the kubectl context to point to the kind cluster. You can also check the nodes by kubectl get nodes. Here is my screenshot

Accessing Services using Ingress.
Exposing local machine ports to cluster
Let’s say you deployed a simple service that would echo a string on to the browser. In order to access this server we need an ingress that would allow traffic flowing outside the cluster(from your local laptop) to the inside cluster. For this Kind supports many ingress, we will be using Nginx-Ingress controller to access the service. Before setting up the ingress control there is something you have to know, When you expose a service within kubernetes, you expose it through port, if its https it would be on 443 or 80 or if you would like you cloud expose a high port like 32000. Once configure ingress to expose a service lets say 443 and 80 , You should also let kind know which port it should expose from your local laptop to the cluster since kind create the docker nodes, it has to bootstrap the docker network bridges to chain the traffic from your laptop to all the way to the k8 cluster. For this Kind allow ```extraPortMapping” option within your kind.config file. To expose the kind docker nodes 443 and 80 , you would have to have following in the kind. Config file
kind: Cluster
apiVersion: kind.x-k8s.io/v1alpha4
nodes:
- role: control-plane
- role: worker
 extraPortMappings:
  - containerPort: 80
    hostPort: 80
    protocol: TCP
  - containerPort: 443
    hostPort: 443
    protocol: TCP
Now when you create the cluster using kind create cluster --name my-cluster --config kind.config you will see kind creates the docker container with the above ports exposed , you can check that with following command docker ps and observe the port mapping. With this you will be able to access any service exposed in your cluster at 443 from laptop since 443 is exposed from local laptop to kind nodes.
Please note that any port you expose will be opened for all the nodes(docker containers) this means that you can access your nodePort type service as well using the port. Install Ngnix-Ingress
You can deploy your service now just as you would to any other kube cluster, However , to access the service you would need an ingress to connect your service from KinD clusters to your local machine for this KinD support multiple ingress. Here in this post , I am going to show how to use the Nginx-Ingress controller within the KinD cluster.
Assuming that you have kubectl already installed on your machine, you can install ingress Niginx-Ingress using the following command.
kubectl apply -f https://raw.githubusercontent.com/kubernetes/ingress-nginx/master/deploy/posts/images/provider/kind/deploy.yaml
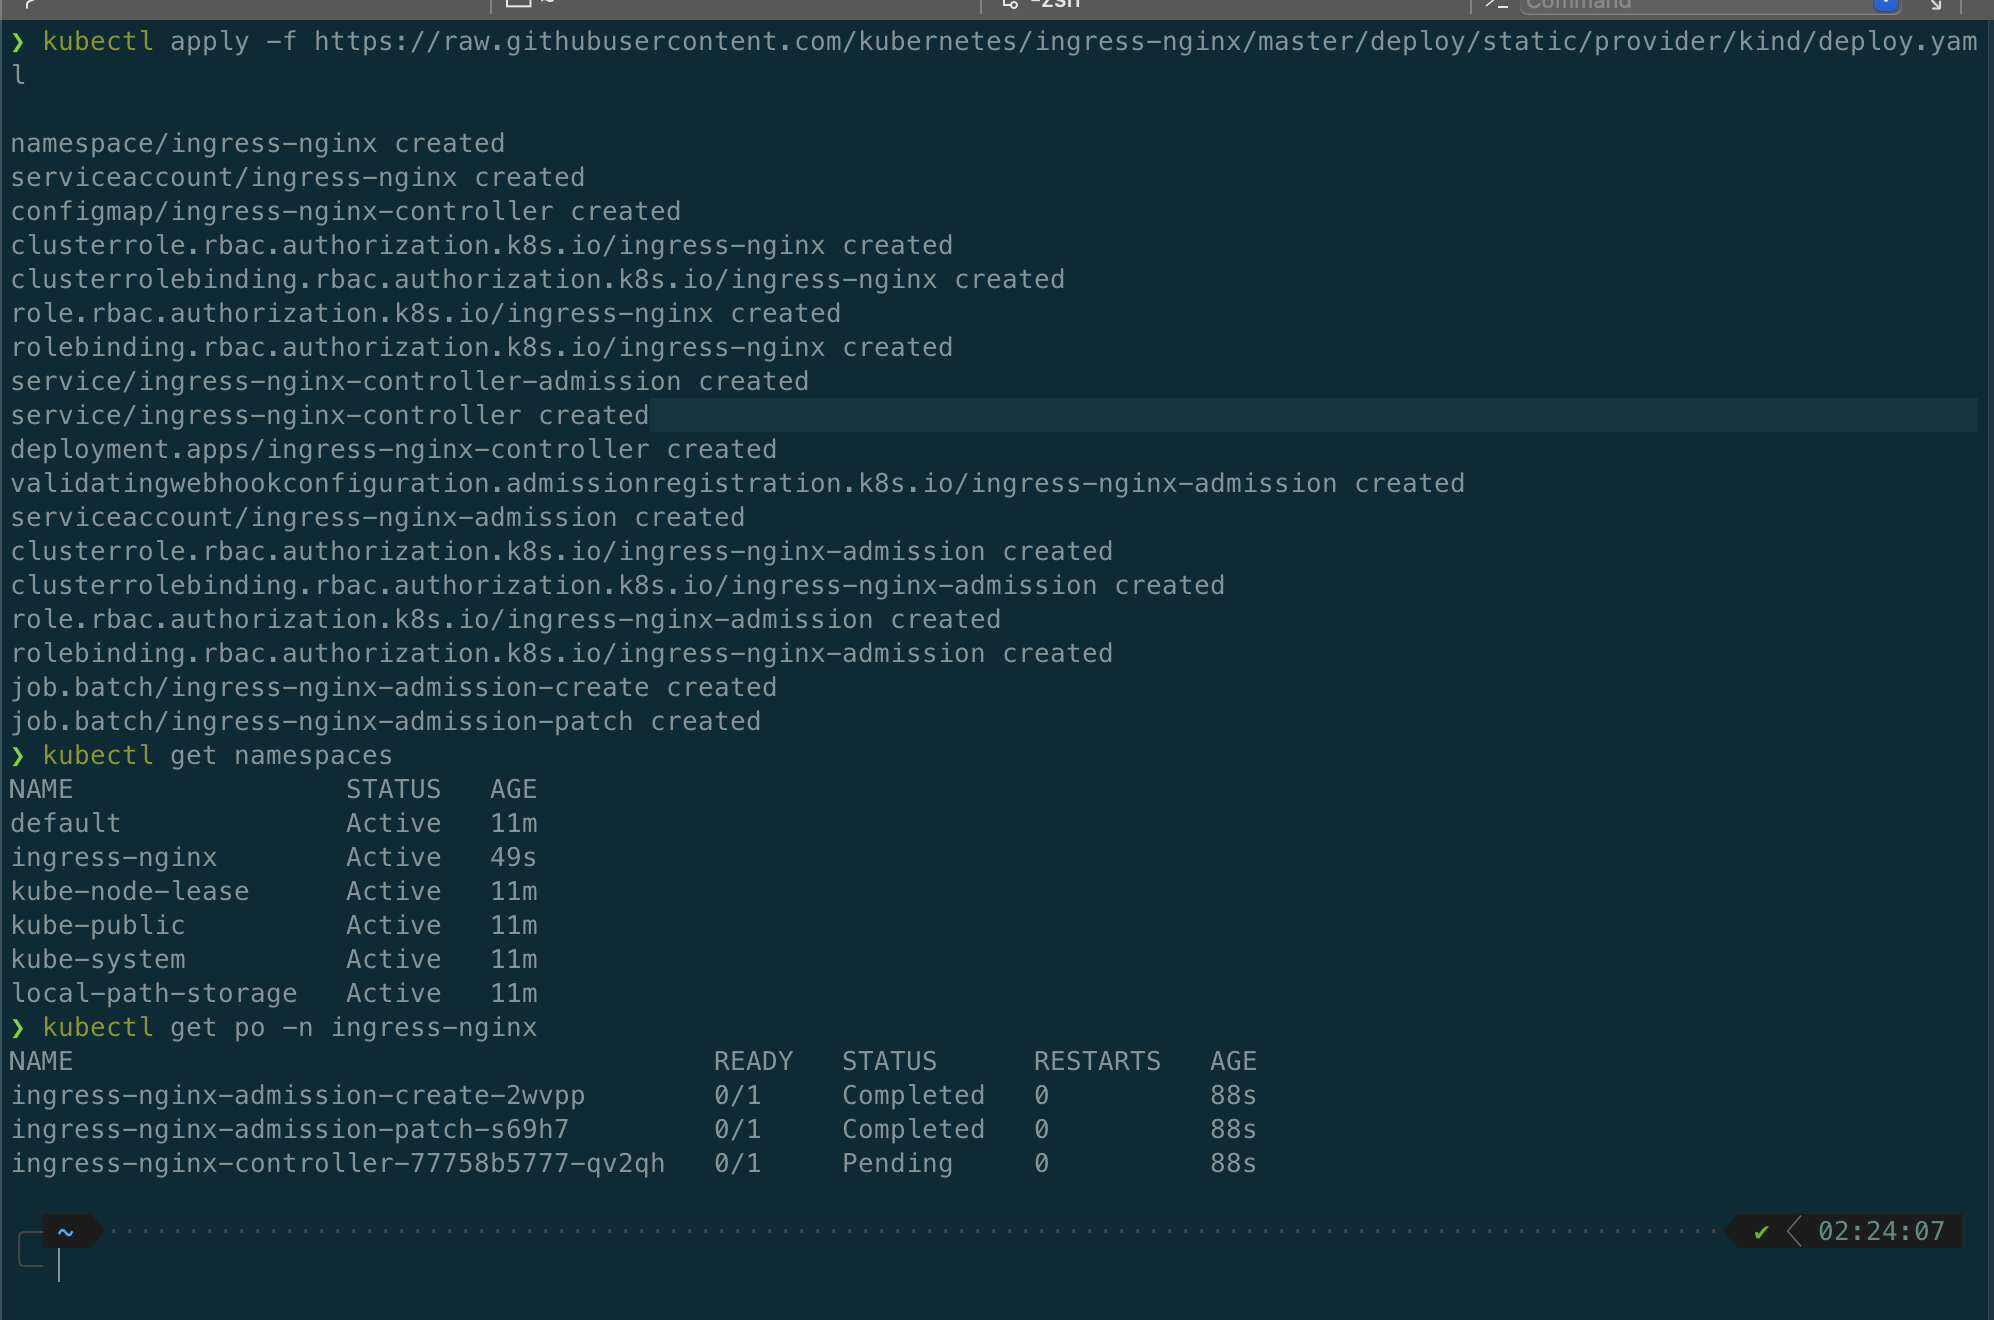
Kubectl will pull and apply all the resources related to the Nginx-Ingress into your cluster in its own ingress-nginx namespace. Please note that these are specific resources to allow us to work with kind. This may take a couple of seconds to resource to be created. You check the status by using the following command.
kubectl get po -n ingress-nginx.
Once the pods are ready, you can start deploying your resource.
