Prerequisites
Before following this guide, ensure you have:
- Docker and docker-compose installed.
- An API client like Bruno (used in this guide) or Postman.
Goal
Goal is to explore the OAuth 2.0 Device Authorization Grant using Keycloak and the Bruno API client.
What is OAuth 2.0 Device Authorization Grant?
The OAuth Device Authorization Grant (urn:ietf:params:oauth:grant-type:device_code) is one of the grant types defined in OAuth 2.0. This grant is designed for scenarios where the app is running on a device with limited input capabilities, such as a TV, game console, or CLI environment, where the user cannot easily enter their credentials. Instead, the user completes the authentication process on another device, such as a smartphone or computer, which has a full browser and input capabilities.
Grant Flow
Image from : https://datatracker.ietf.org/doc/html/rfc8628#section-3.4
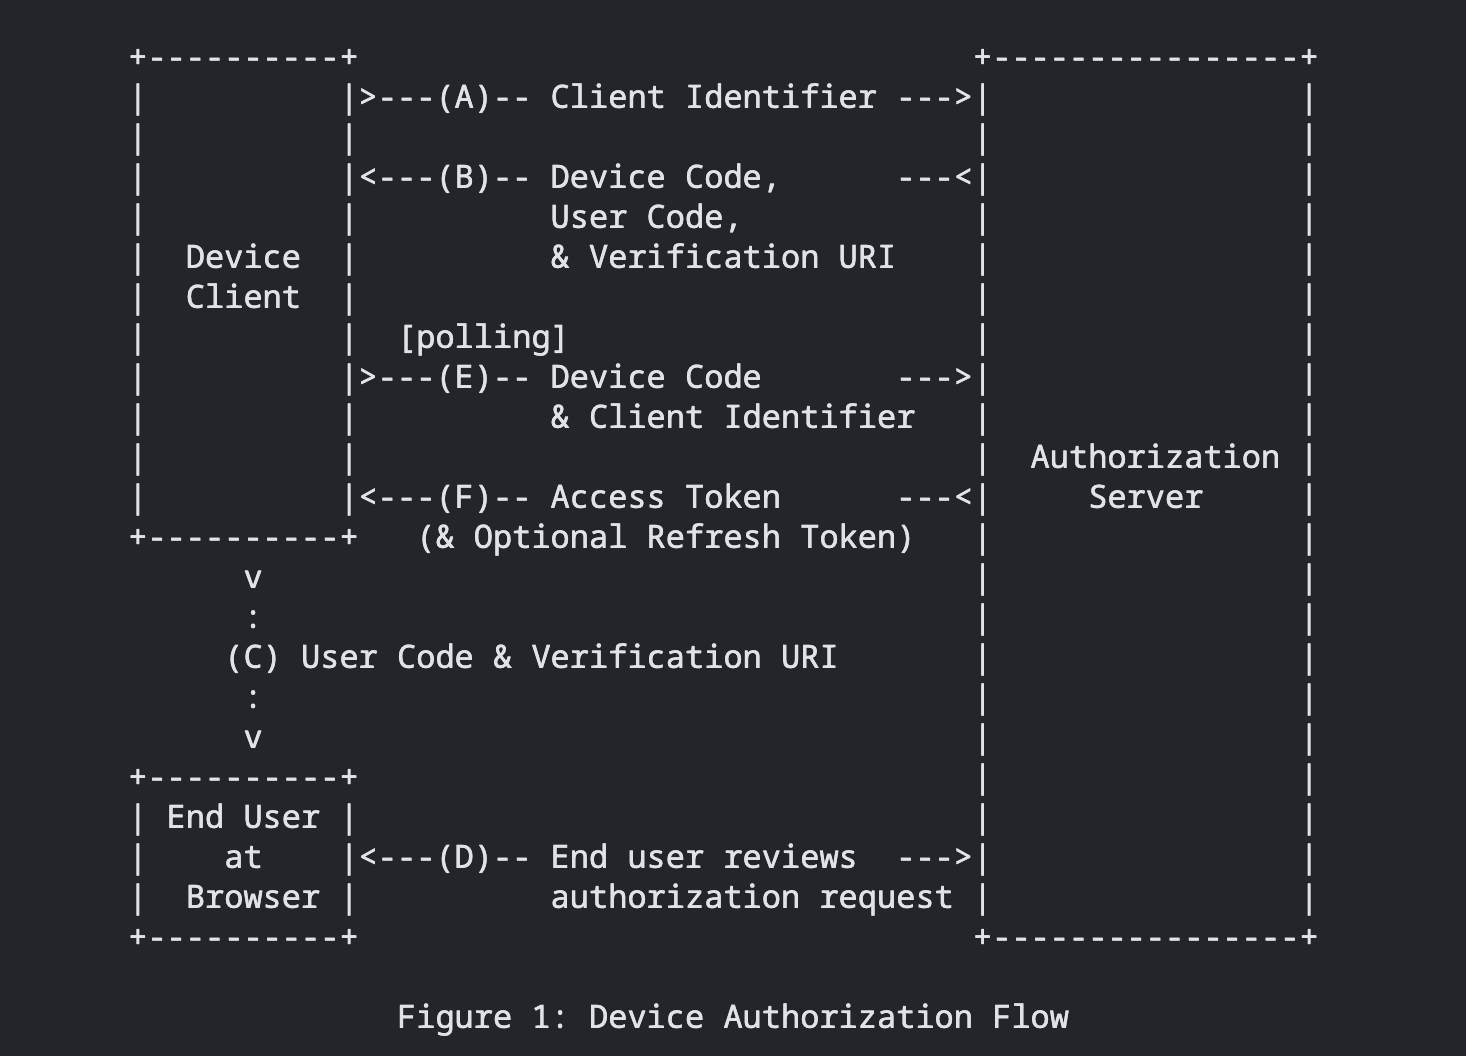
Device Authentication Code Flow
- The Device Client initiates a request to the server to generate a unique client identifier.
- The server responds with a
devicecode and averification_complete_url. - The Device Client then prompts the user to visit the
verification_complete_url. - The user completes the authentication by using the
verification_complete_url. - While the user is authenticating, the Device Client periodically polls the server to check the status:
- If authentication is complete, the server responds with an
access_token. - If authentication is not yet complete, the server responds with a “slow down” message to manage polling frequency.
- If authentication is complete, the server responds with an
Keycloak docker setup
use below docker-compose file to bring up the Keycloak
version: '3.8'

services:
  postgres:
    image: postgres:15.3
    container_name: postgres
    environment:
      POSTGRES_DB: keycloakdb
      POSTGRES_USER: keycloakuser
      POSTGRES_PASSWORD: keycloakpass
    volumes:
      - postgres_data:/var/lib/postgresql/data
    networks:
      - keycloak-net

  keycloak:
    image: quay.io/keycloak/keycloak:latest
    container_name: keycloak
    environment:
      DB_VENDOR: postgres
      DB_ADDR: postgres
      DB_DATABASE: keycloakdb
      DB_USER: keycloakuser
      DB_PASSWORD: keycloakpass
      KEYCLOAK_ADMIN: admin # username you would use to login to admin console  ui
      KEYCLOAK_ADMIN_PASSWORD: admin # password you would use to login to admin console  ui
    command:
      - start-dev
    ports:
      - 8089:8080
    depends_on:
      - postgres
    networks:
      - keycloak-net

volumes:
  postgres_data:

networks:
  keycloak-net:
    driver: bridge
Bring up the keycloak
docker-compose up
Login and client setup
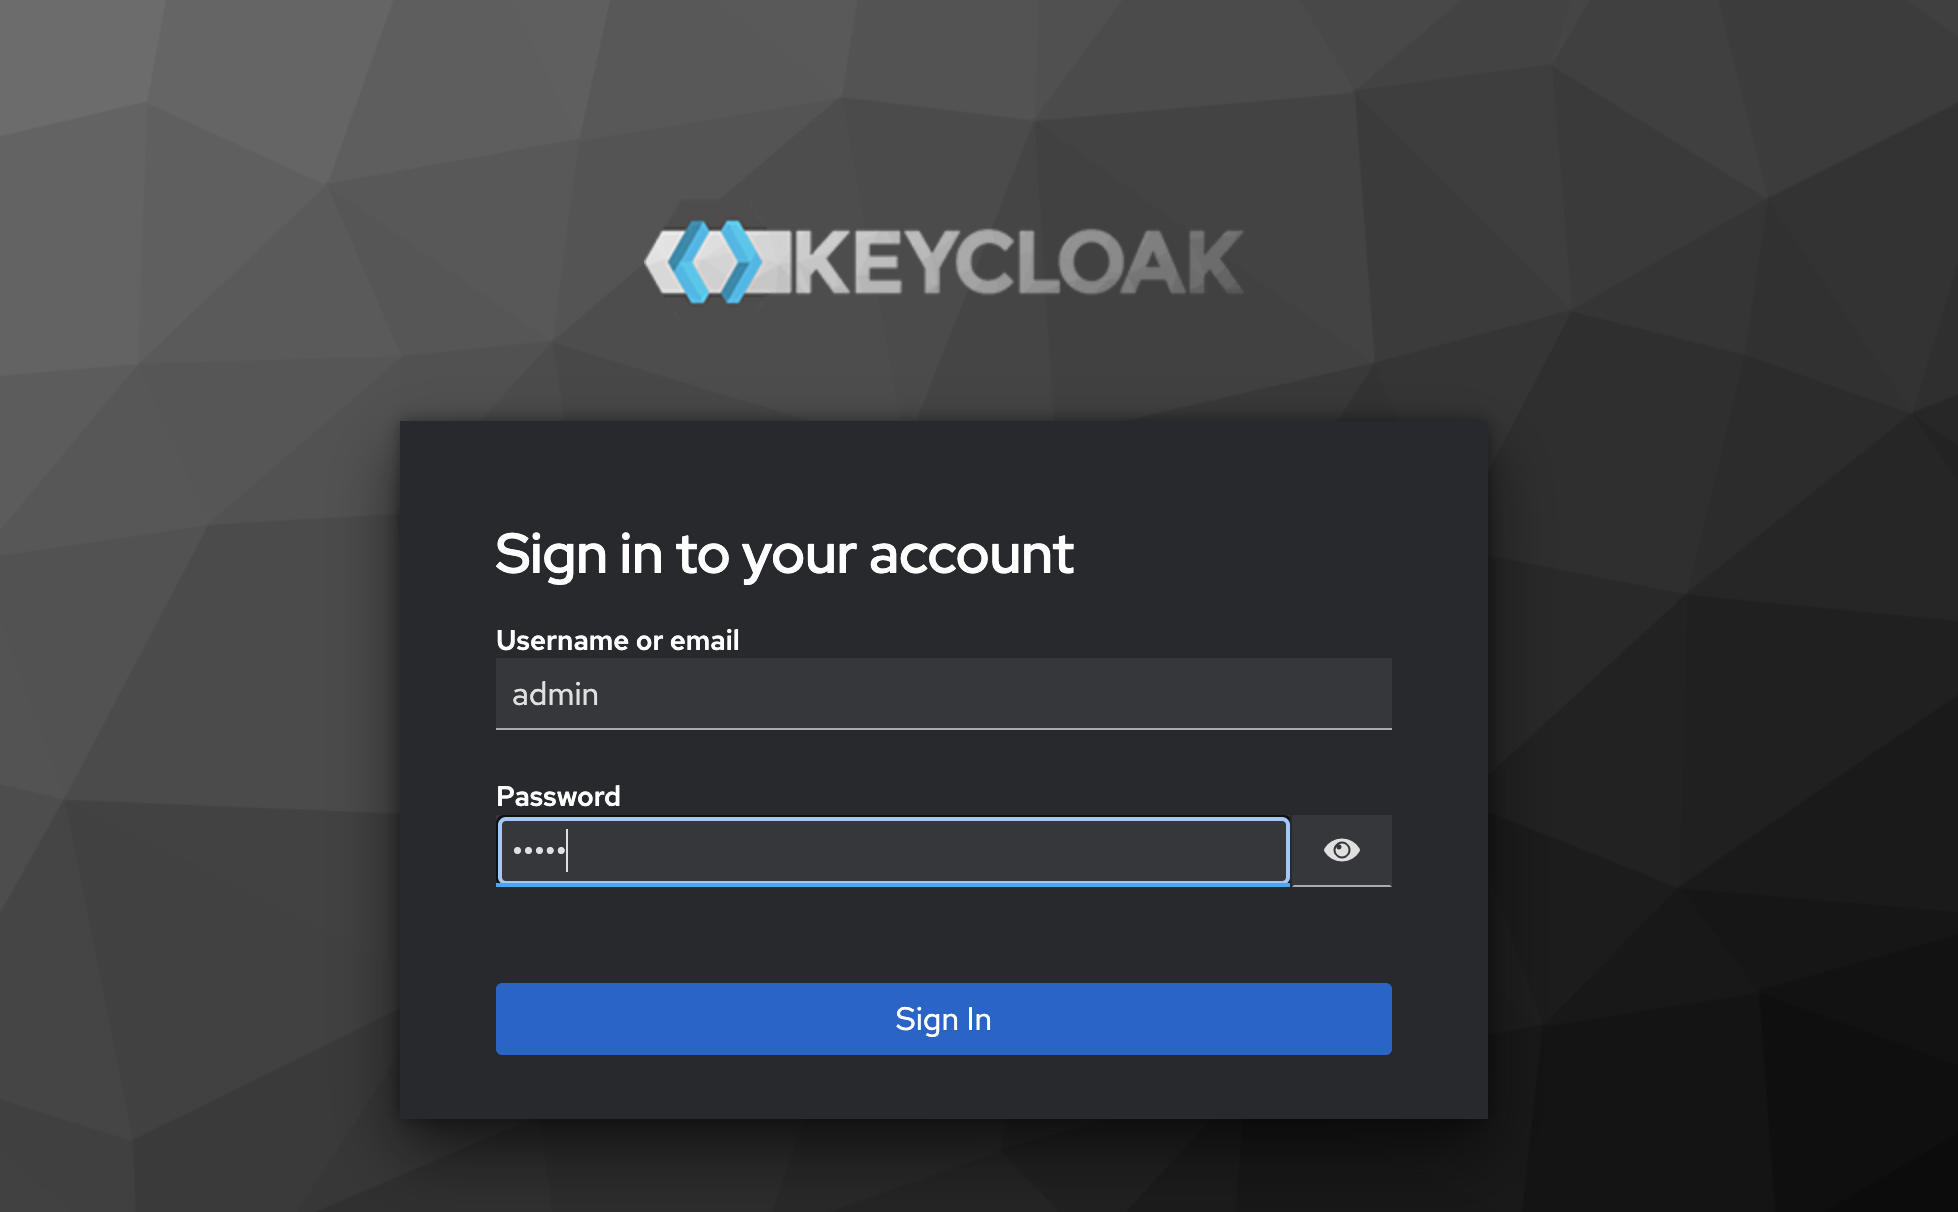
Once the Postgres and keycloak container are up, navigate to http://localhost:8089 and login with you username password that are provided in the docker-compose file.
Login with admin user
Create a Test User (Optional)
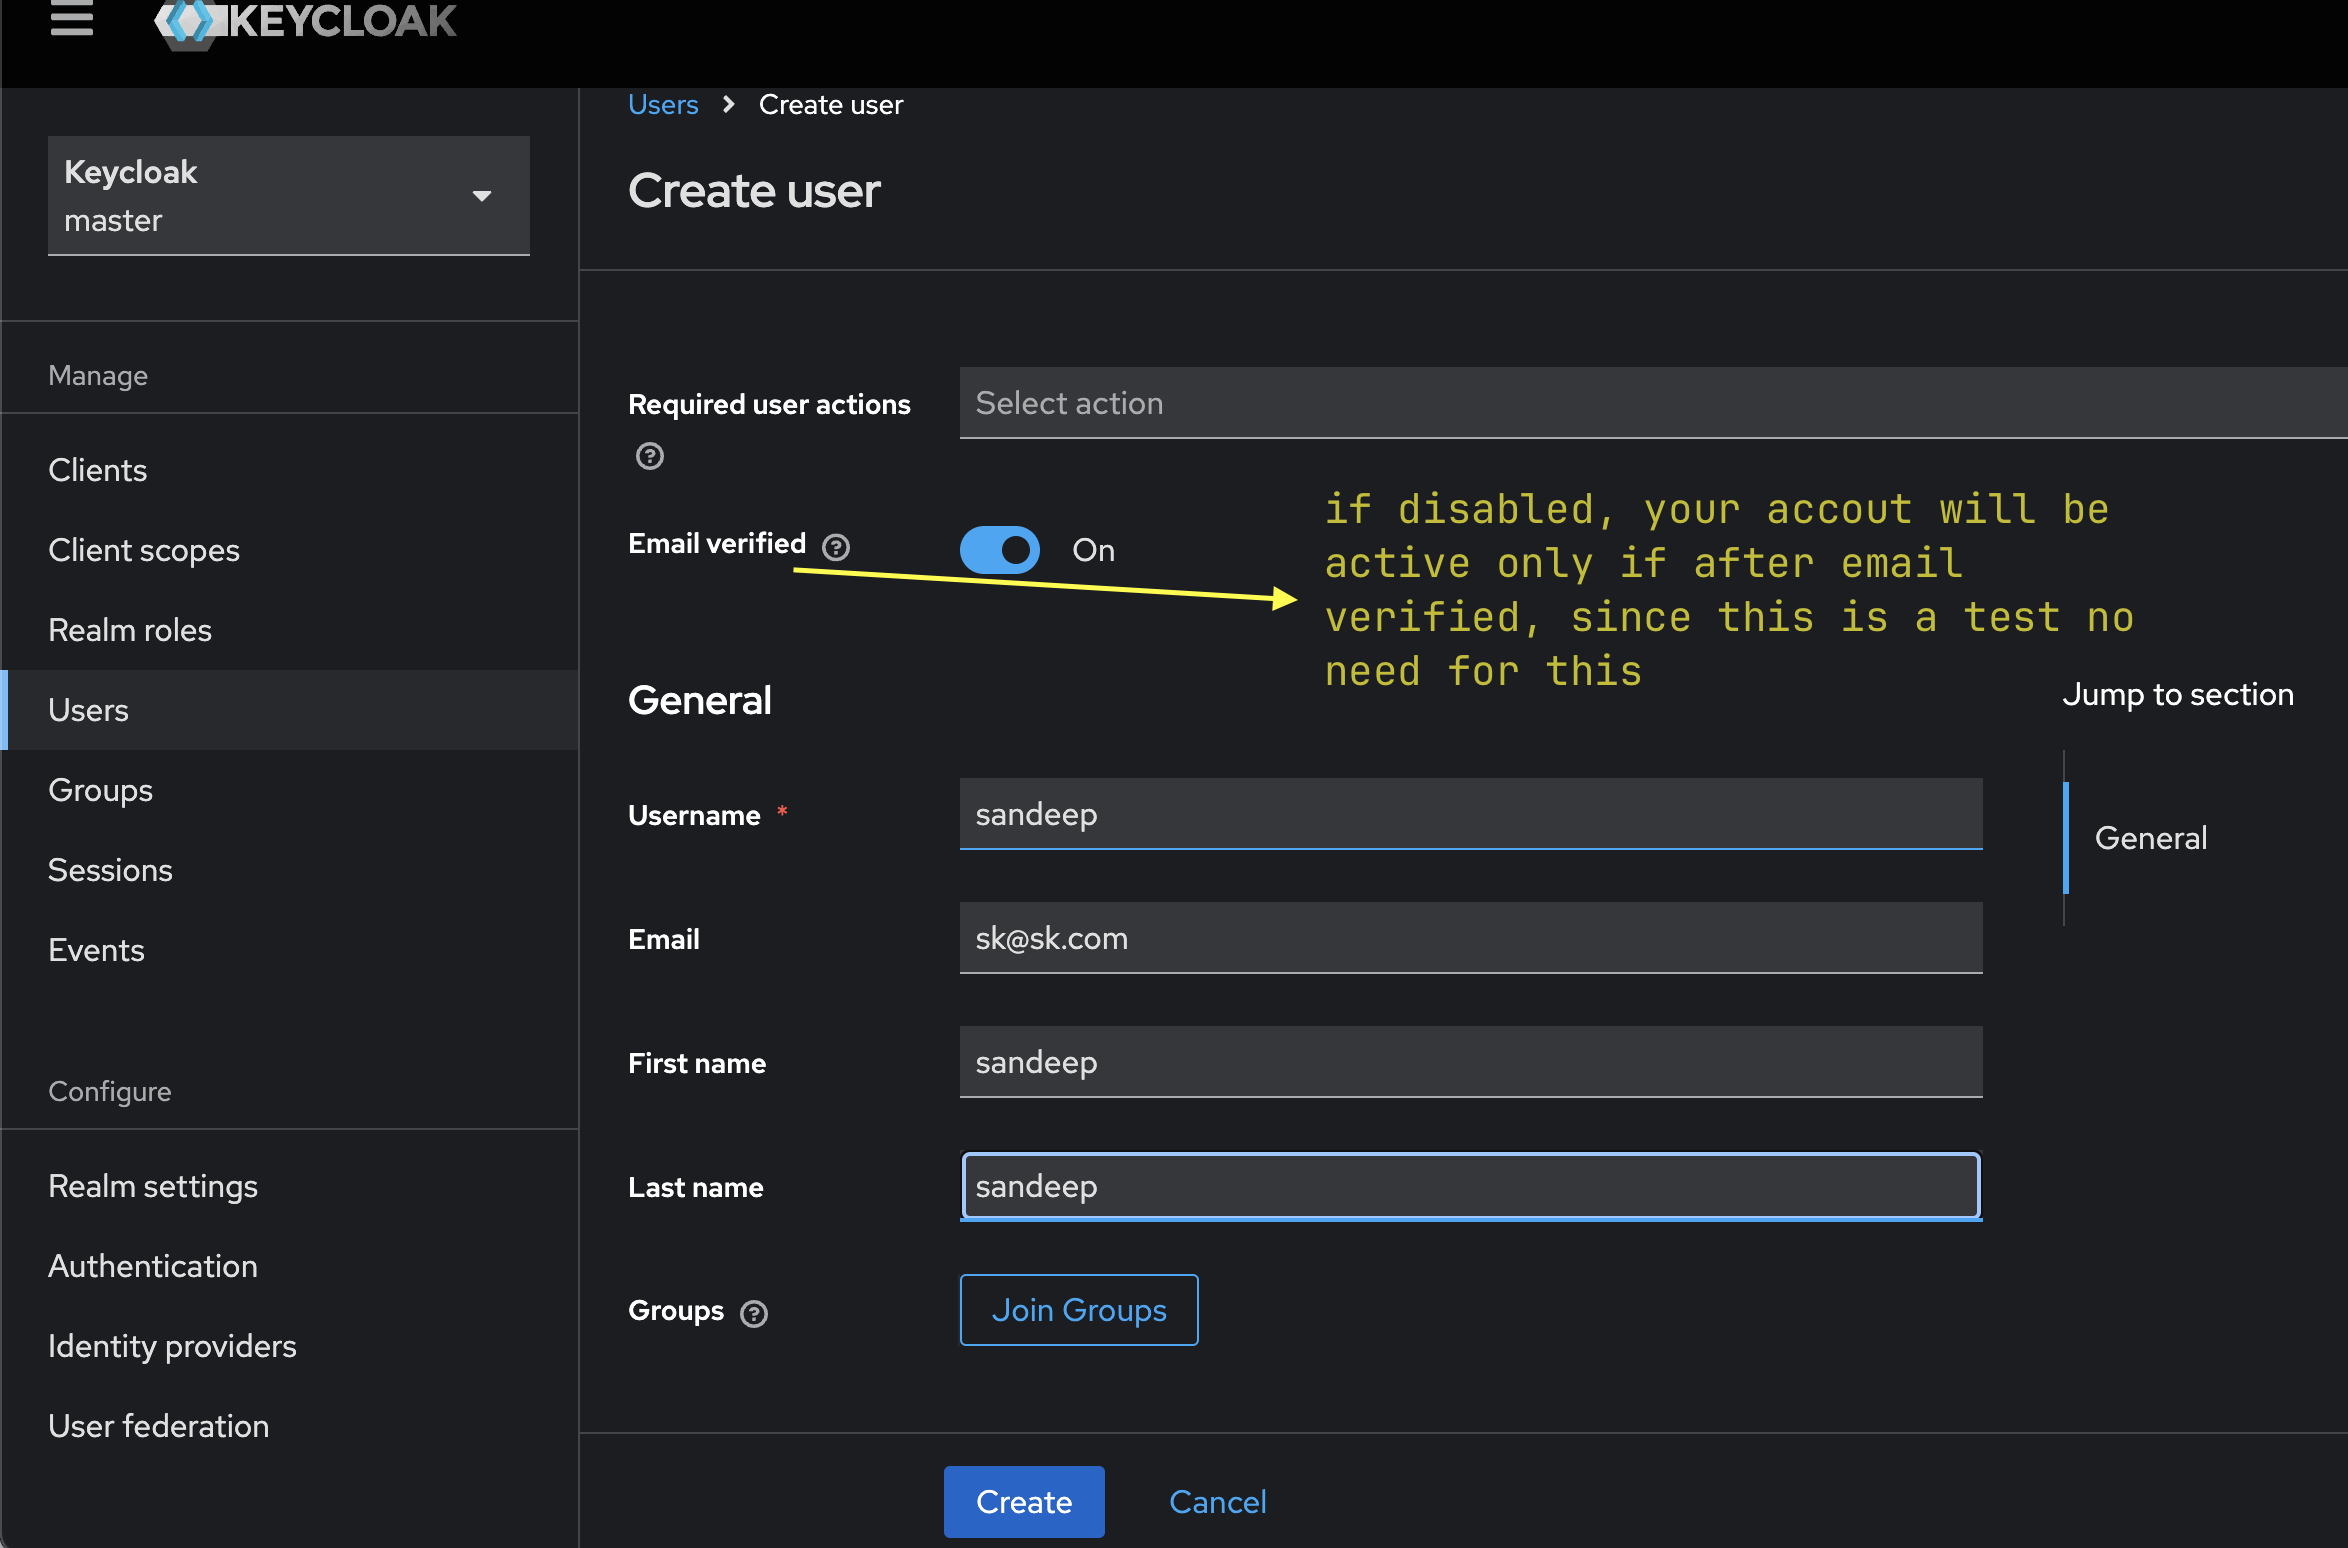
You can use the default admin or create a new user with admin permissions for testing purposes. Here’s how to create a test user:
-
Create a New User:
- Go to the
Userstab and click on Create. - After the user is created, additional configuration tabs will appear.
- Go to the
-
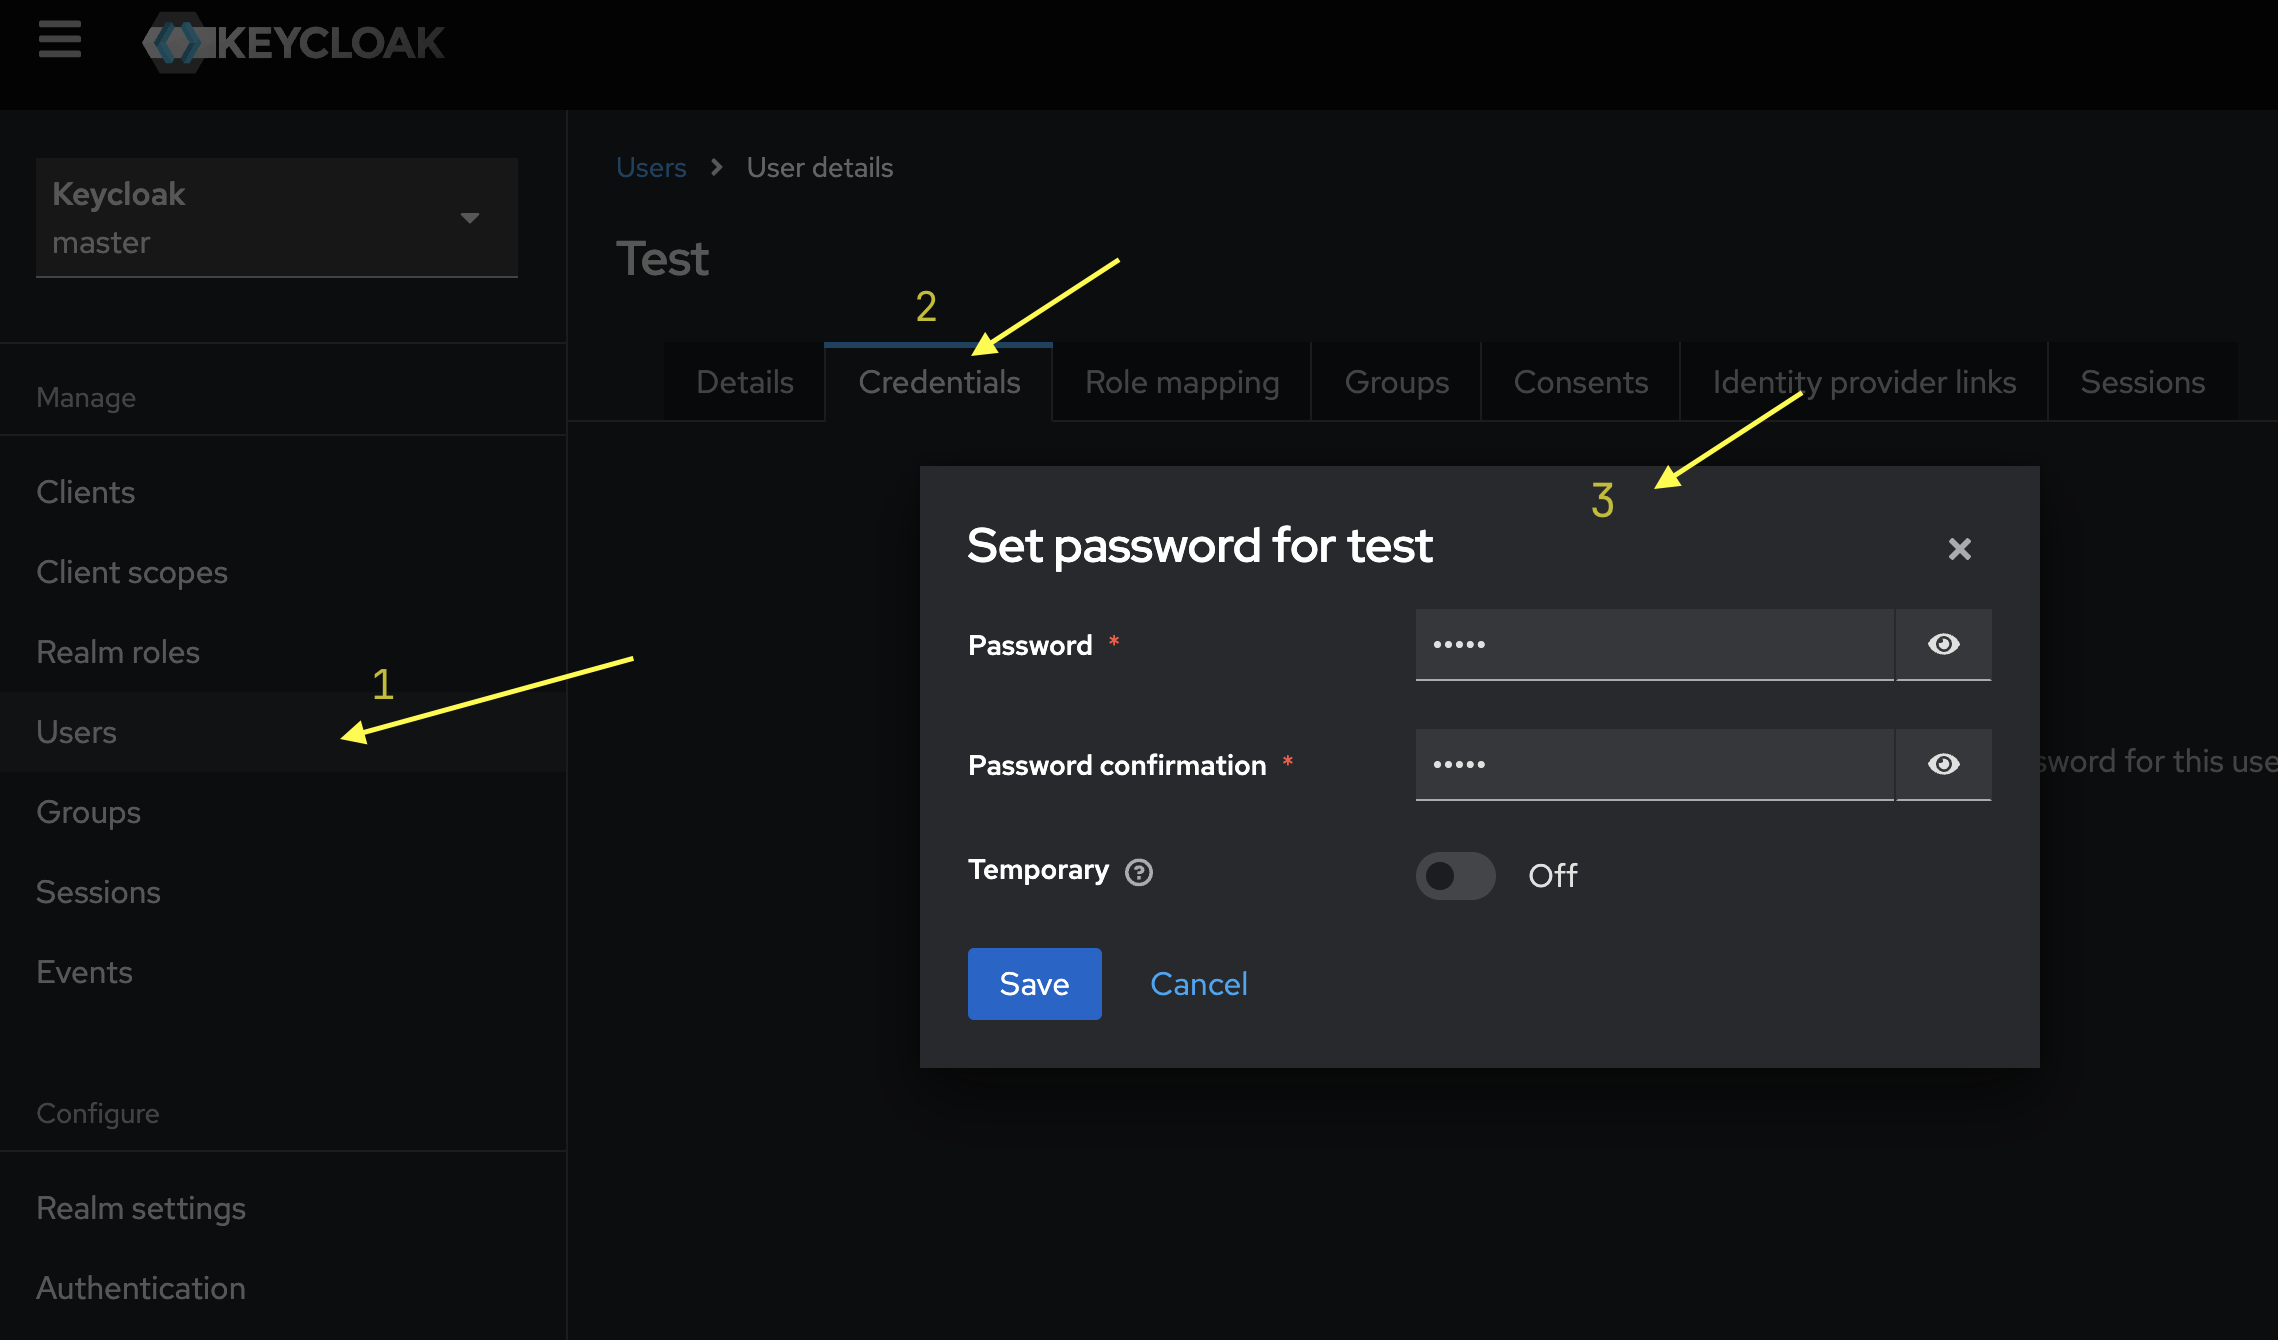
Set Up User Password:
- Navigate to the
Credentialstab to set the user’s password. - Ensure that Temporary is disabled, so the password does not need to be reset on first login.
- Navigate to the
-
Assign Admin Role:
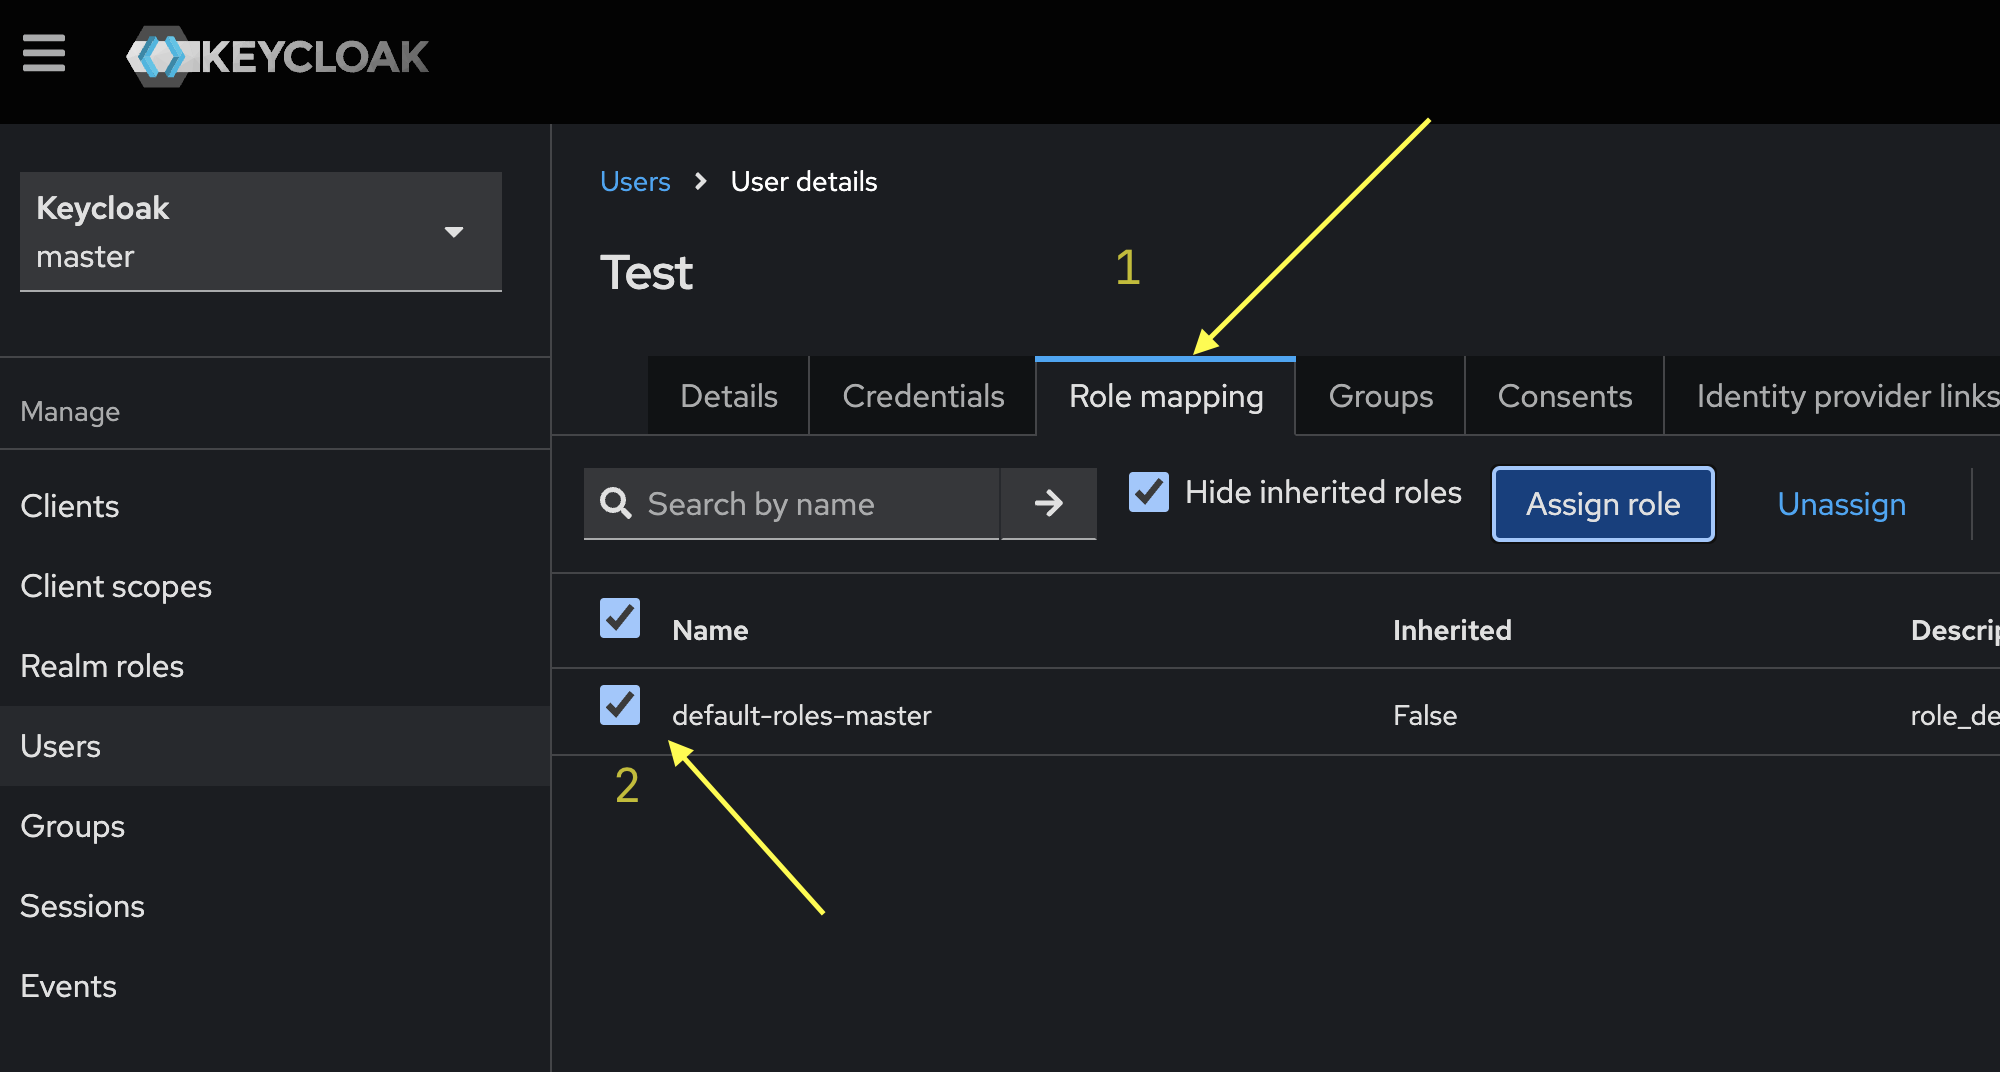
- In the
Rolestab on the user page, select thedefault-roles-masterfor the user. If this role is not present, use the Assign Role button to add the necessary role. - This will give the user admin permissions.
- In the
-
Save User Configuration:
- Return to the
Detailstab and ensure all configuration changes are saved.
- Return to the
-
Logout:
- After saving, log out of the session for the changes to take effect.
Creating a Client in Keycloak
-
Create a New Client:
- Go to the
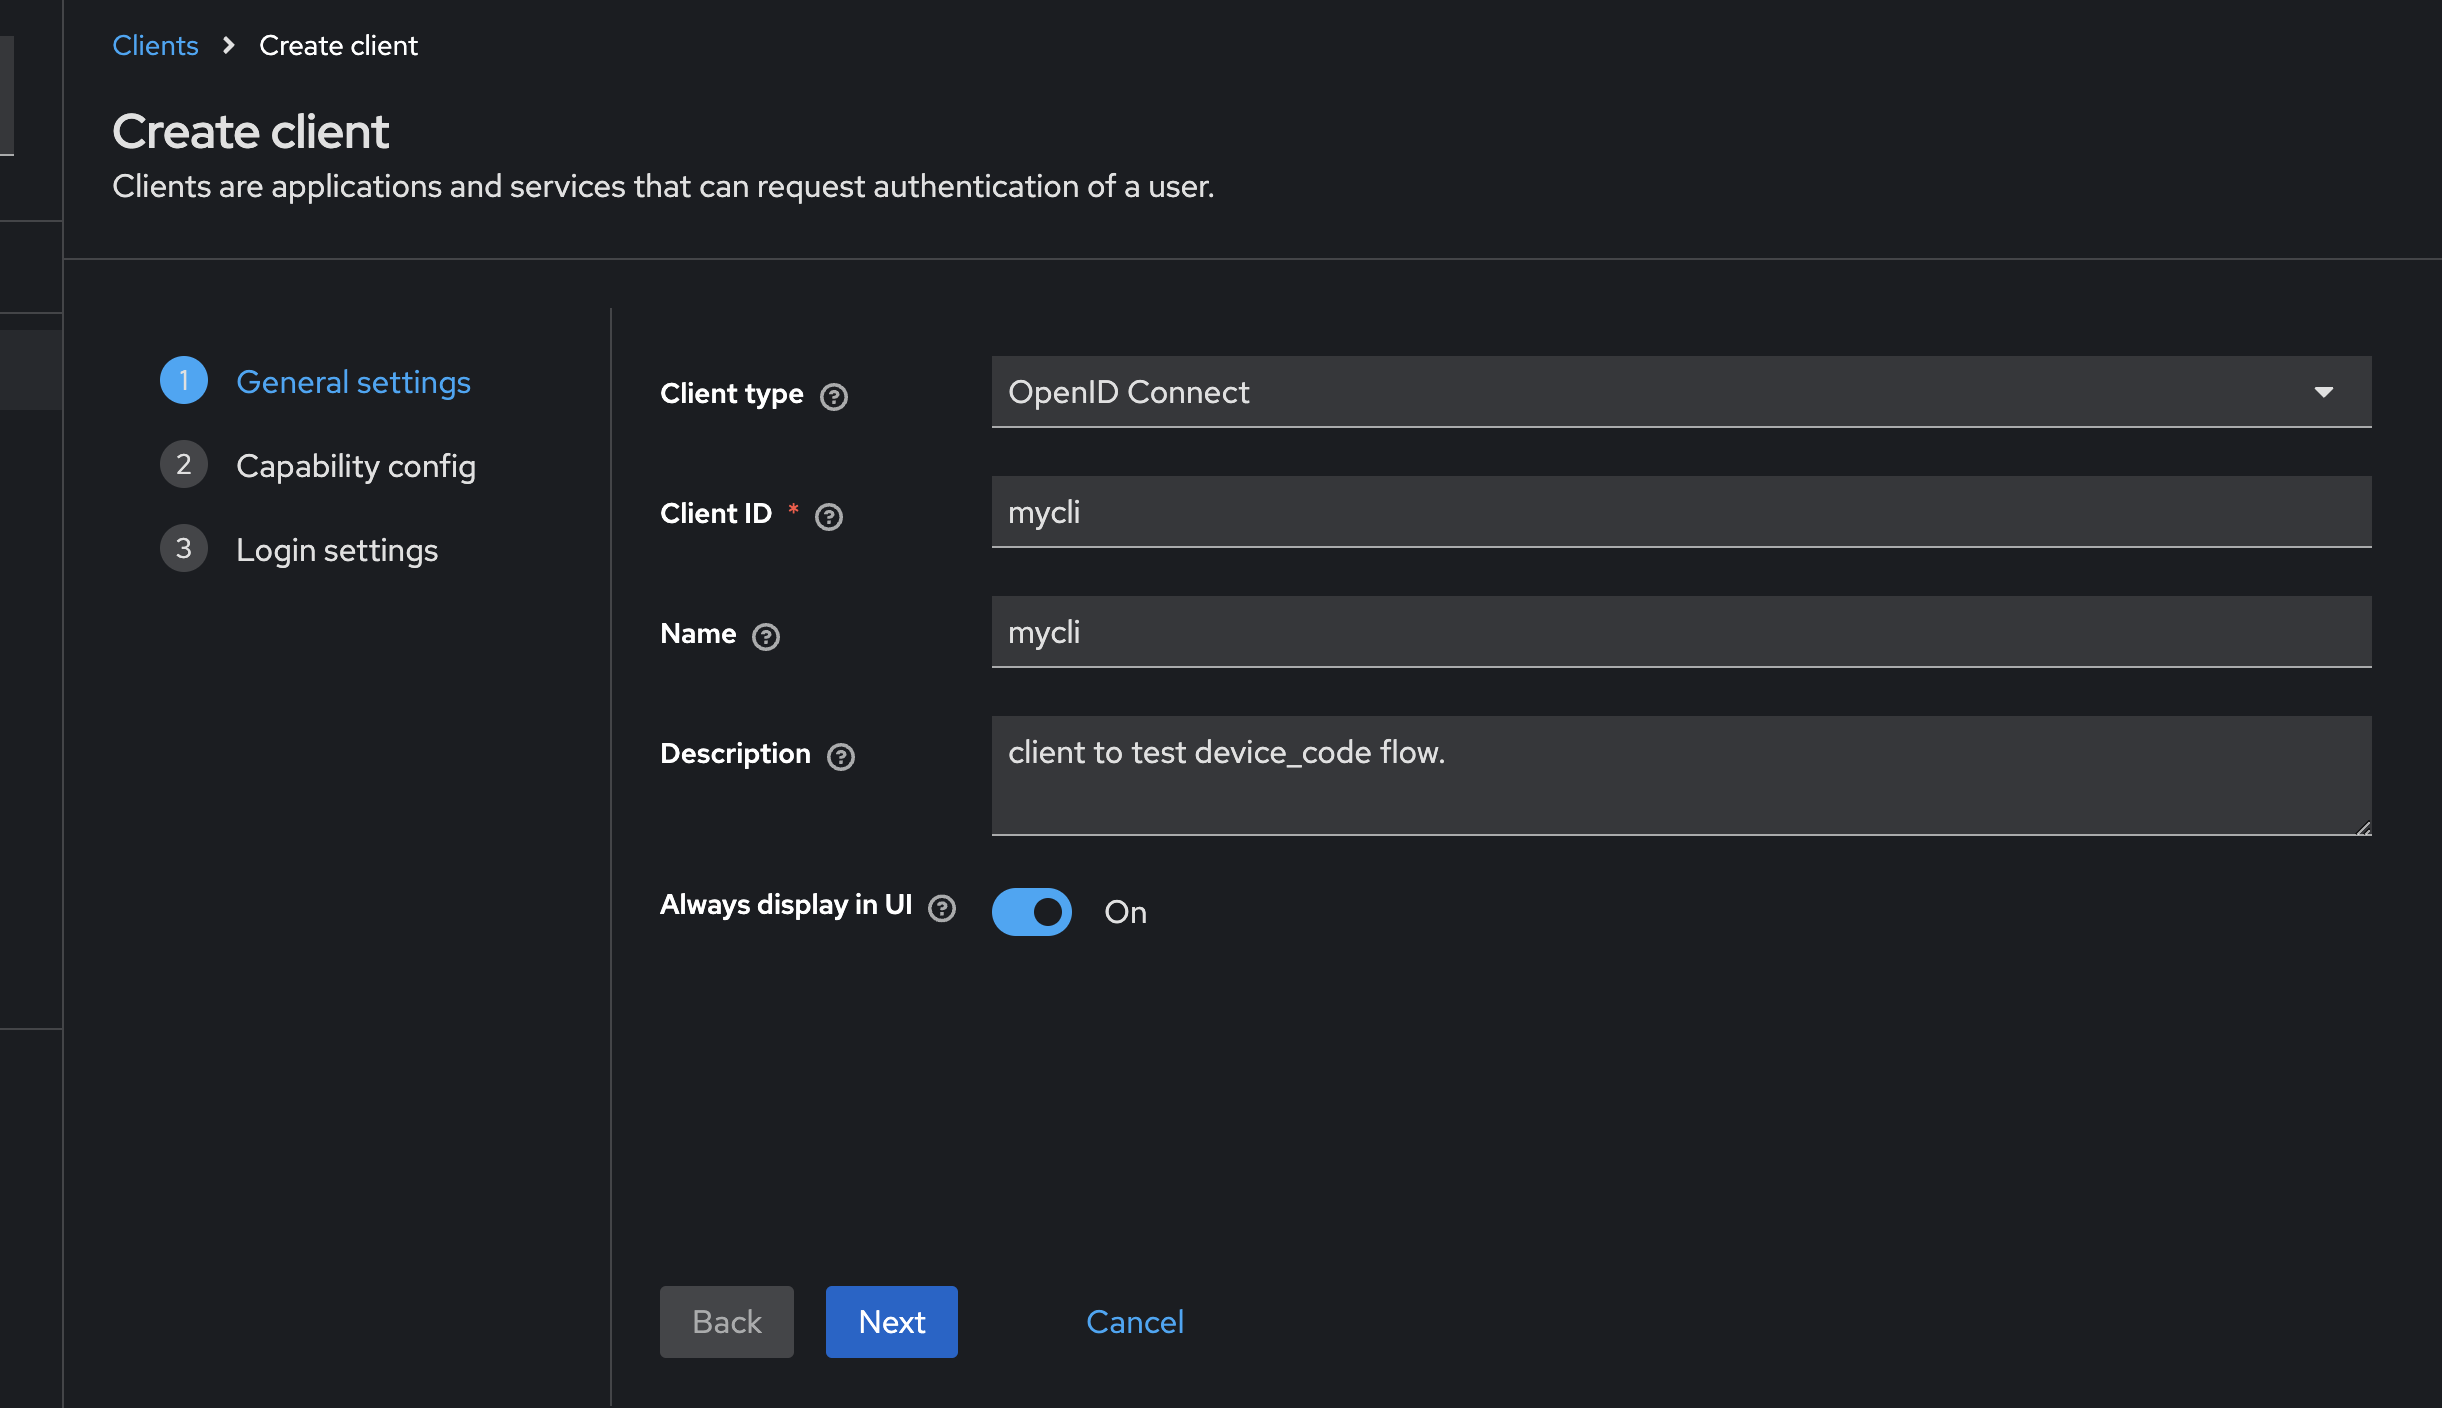
Clientstab and click on Create Client. - Provide a
Client IDand aName. For testing purposes, enable the Always Display in UI option. This makes the client visible even when a user session is not present. Unlike many other IDPs, Keycloak allows you to view all users authenticated through a client from theSessionstab in the client’s configuration screen itsef. Click Next.
- Go to the
-
Configure Capabilities:
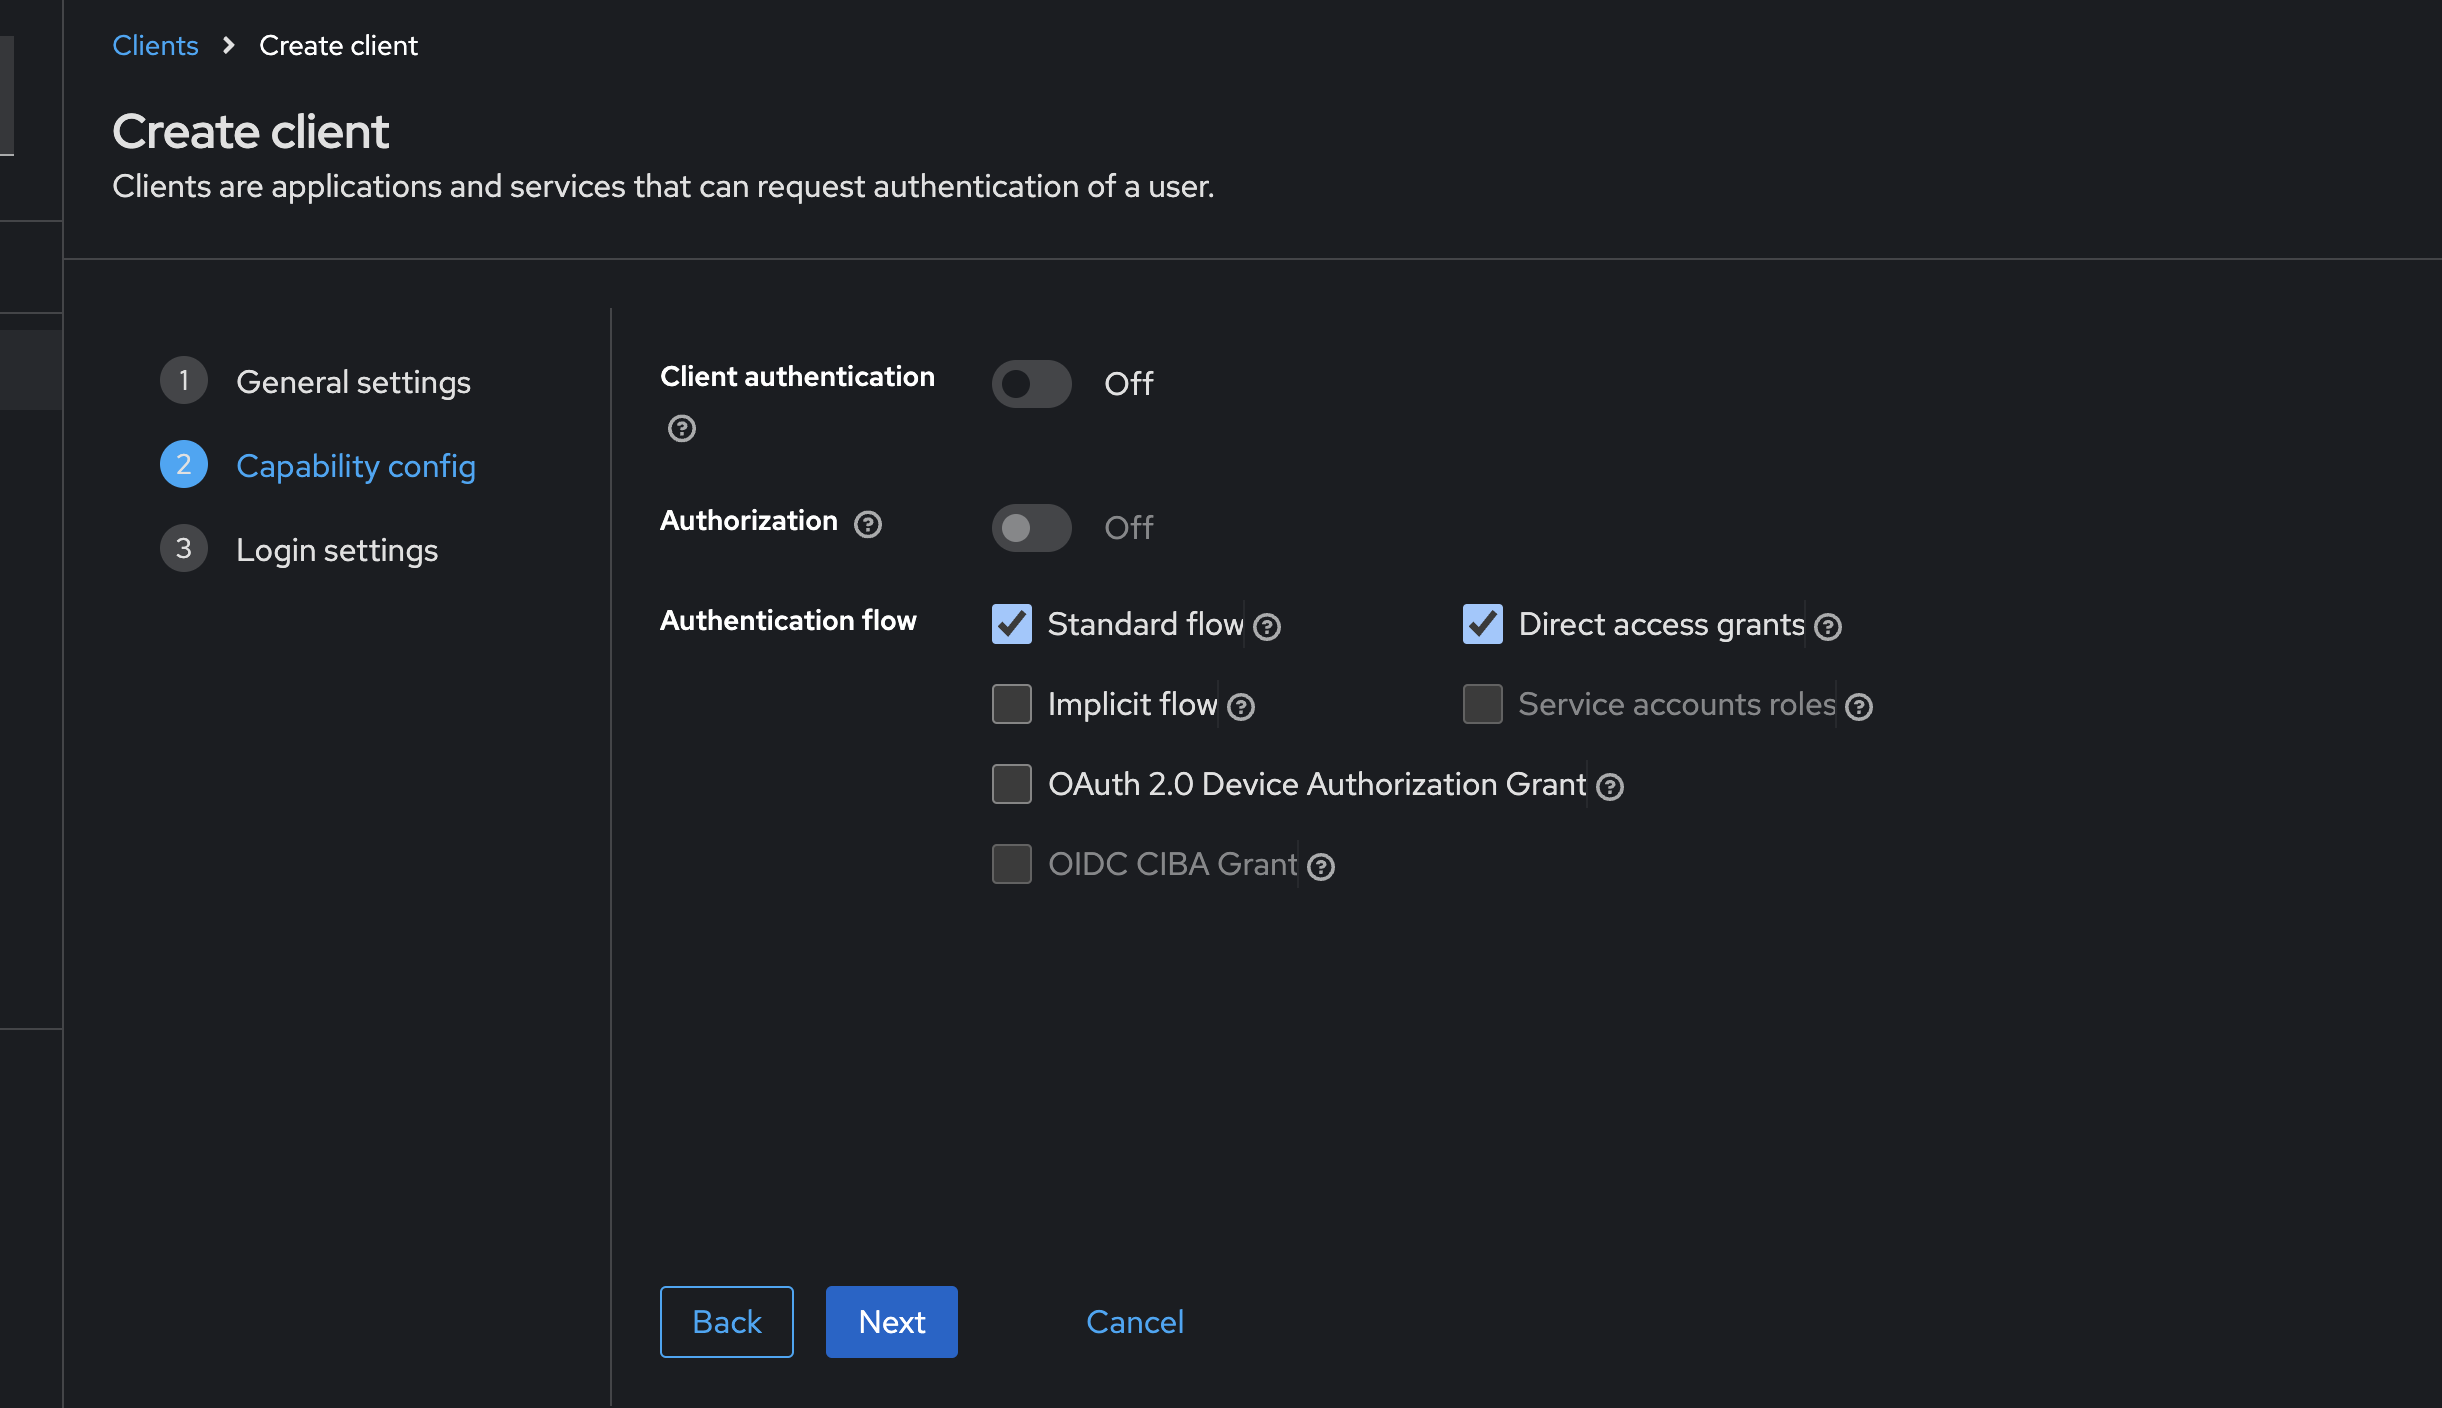
- In the Capability Config section, select OAuth 2.0 Device Authorization Grant.
- I’ll explain the benefits of enabling Client Authentication later in this post. Click Next.
-
Login Settings:
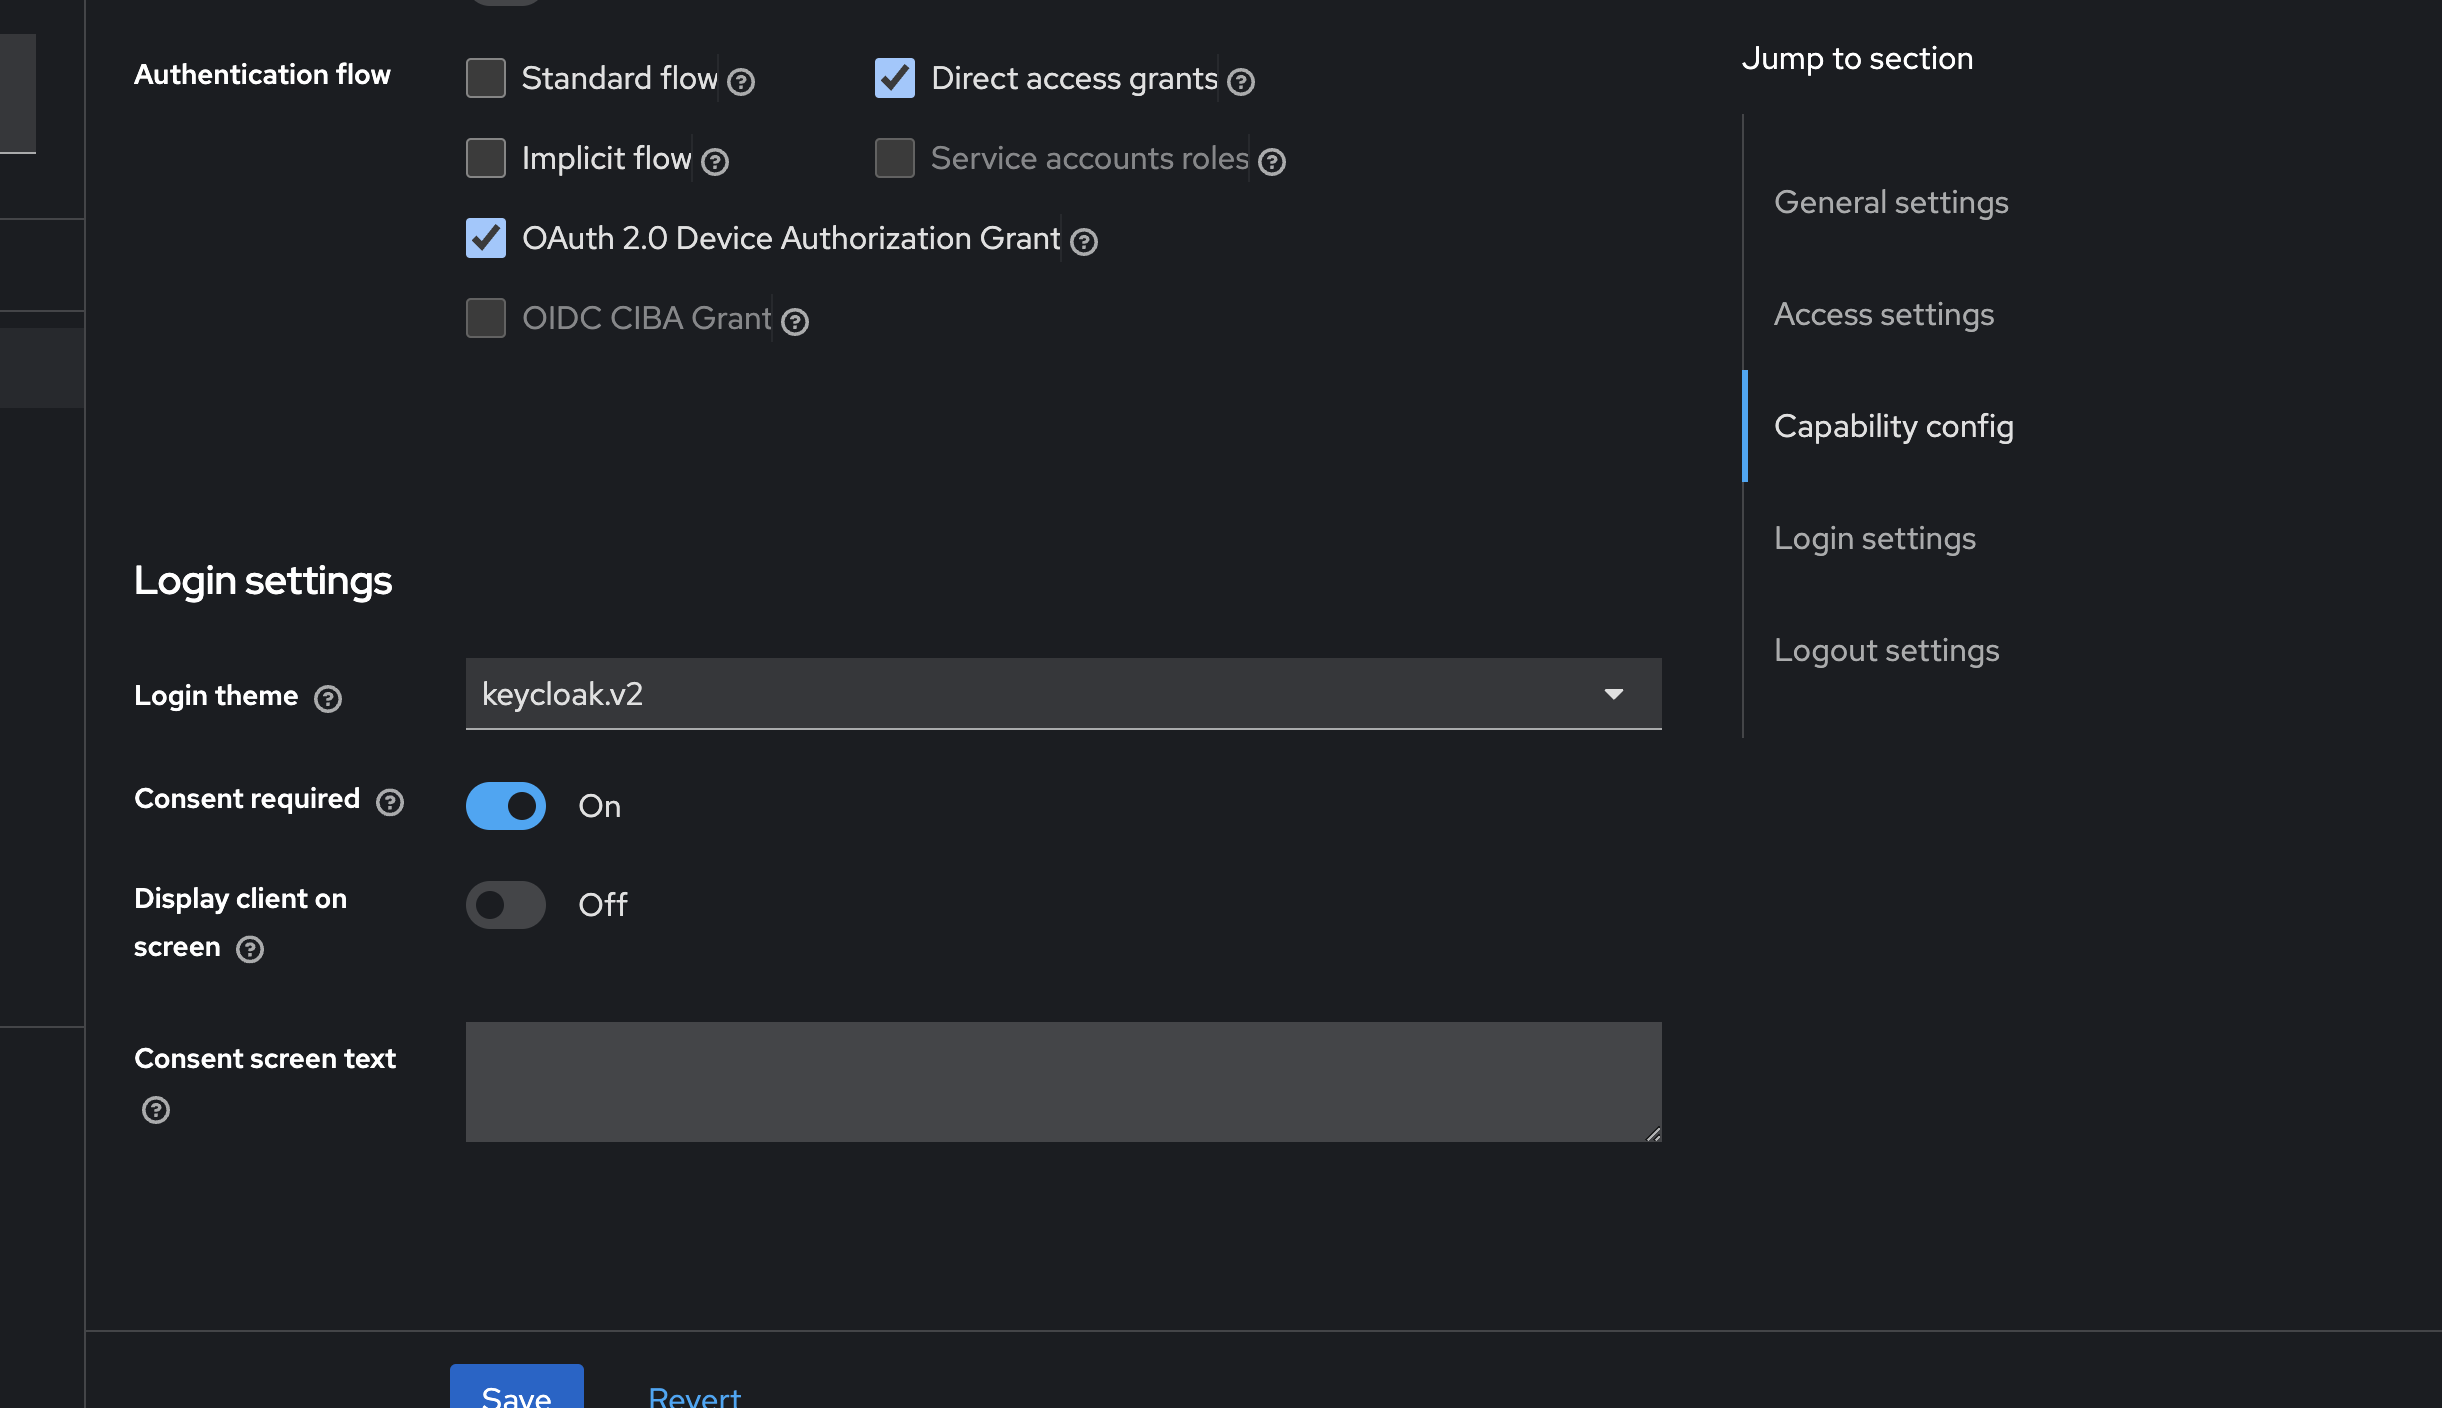
- Leave the default settings for the Login Settings and click Save to create the client.
-
Additional Configuration:
- Once the client is created, additional configuration tabs will appear. Navigate to the Settings tab and enable Consent Required if you’d like to see a consent page after the user logs in (optional).
Token calls
Device code request
curl --request POST \
  --url http://localhost:8089/realms/master/protocol/openid-connect/auth/device \
  --header 'content-type: application/x-www-form-urlencoded' \
  --data client_id=mycli \
  --data client_secret=GTnpoVxZJMbodqX5Q5nlXW4o9rzwEsQw
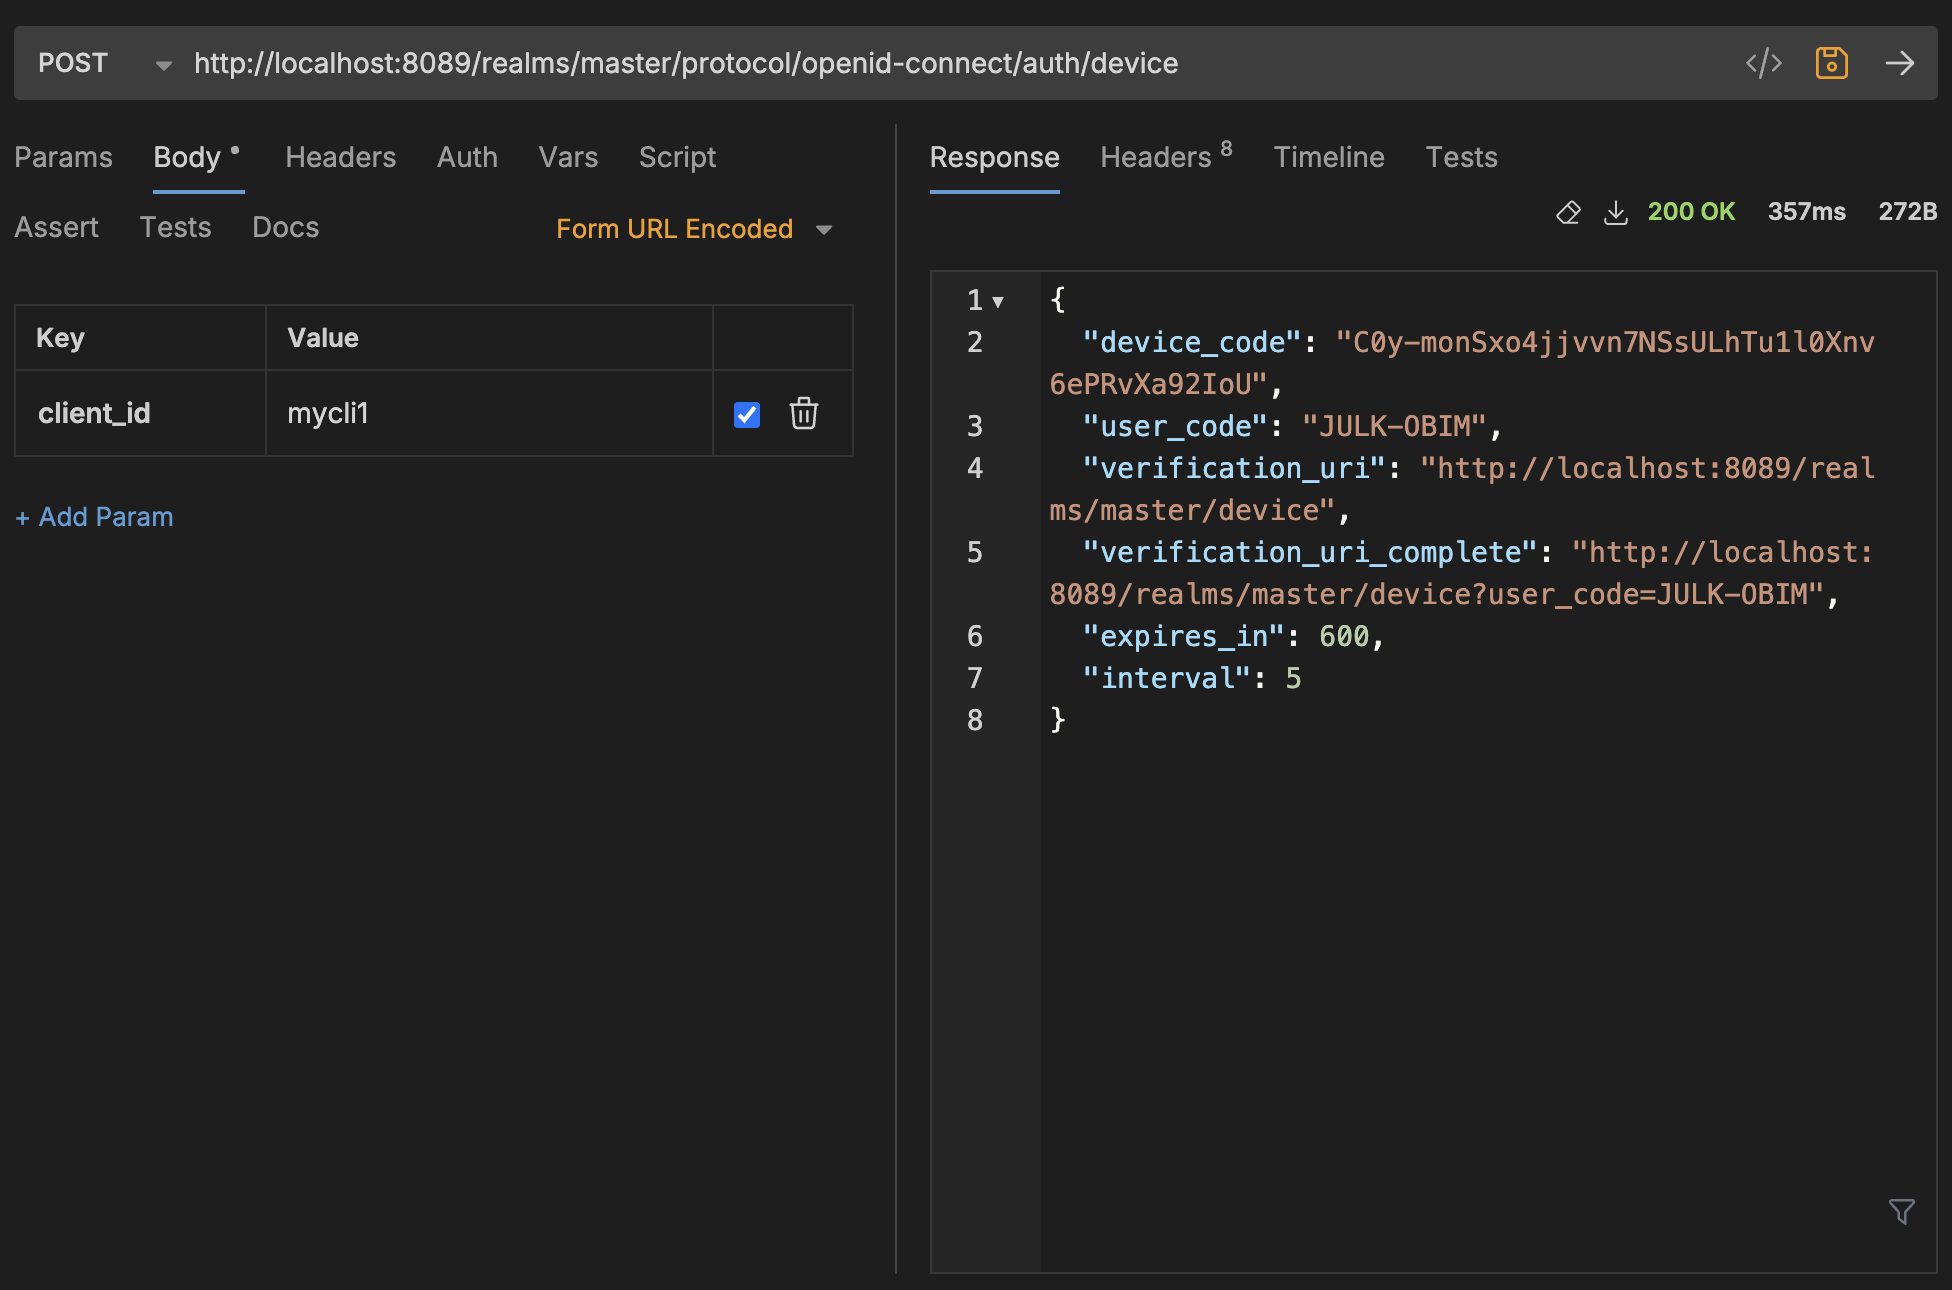
| device_code | This is a unique code associated with the device and the current authentication request. It is used by the client to poll the server to check the authentication status. |
| user_code | This is a code that the user must enter on the authorization server’s web page to authenticate and grant permission. The device client prompts the user to do this |
| verification_uri | The URL where the user should go to complete the authentication process. In this case, the user visits |
| verification_uri_complete | This is the full URL the user can visit, including the user_code (JULK-OBIM in this case). This URL automatically populates the user_code field, making it easier for the user. |
| expires_in | The time (in seconds) that the device_code and user_code remain valid. Here, it is set to 600 seconds (10 minutes). After that, the codes will expire. |
| interval | The minimum amount of time (in seconds) the device should wait between polling requests to the server. In this case, it should wait at least 5 seconds between polls to check if the user has completed authentication. |
Login using browser
- using a browser, navigate to URL provided
verification_uri_complete-urlin the response. Ideally if this was an app, TV , you could create a QR code of the URL and allow user to complete the login from other device. Since we are testing, you can use your browser. - use the admin user or any user to login and finish the login with accepting the consent.
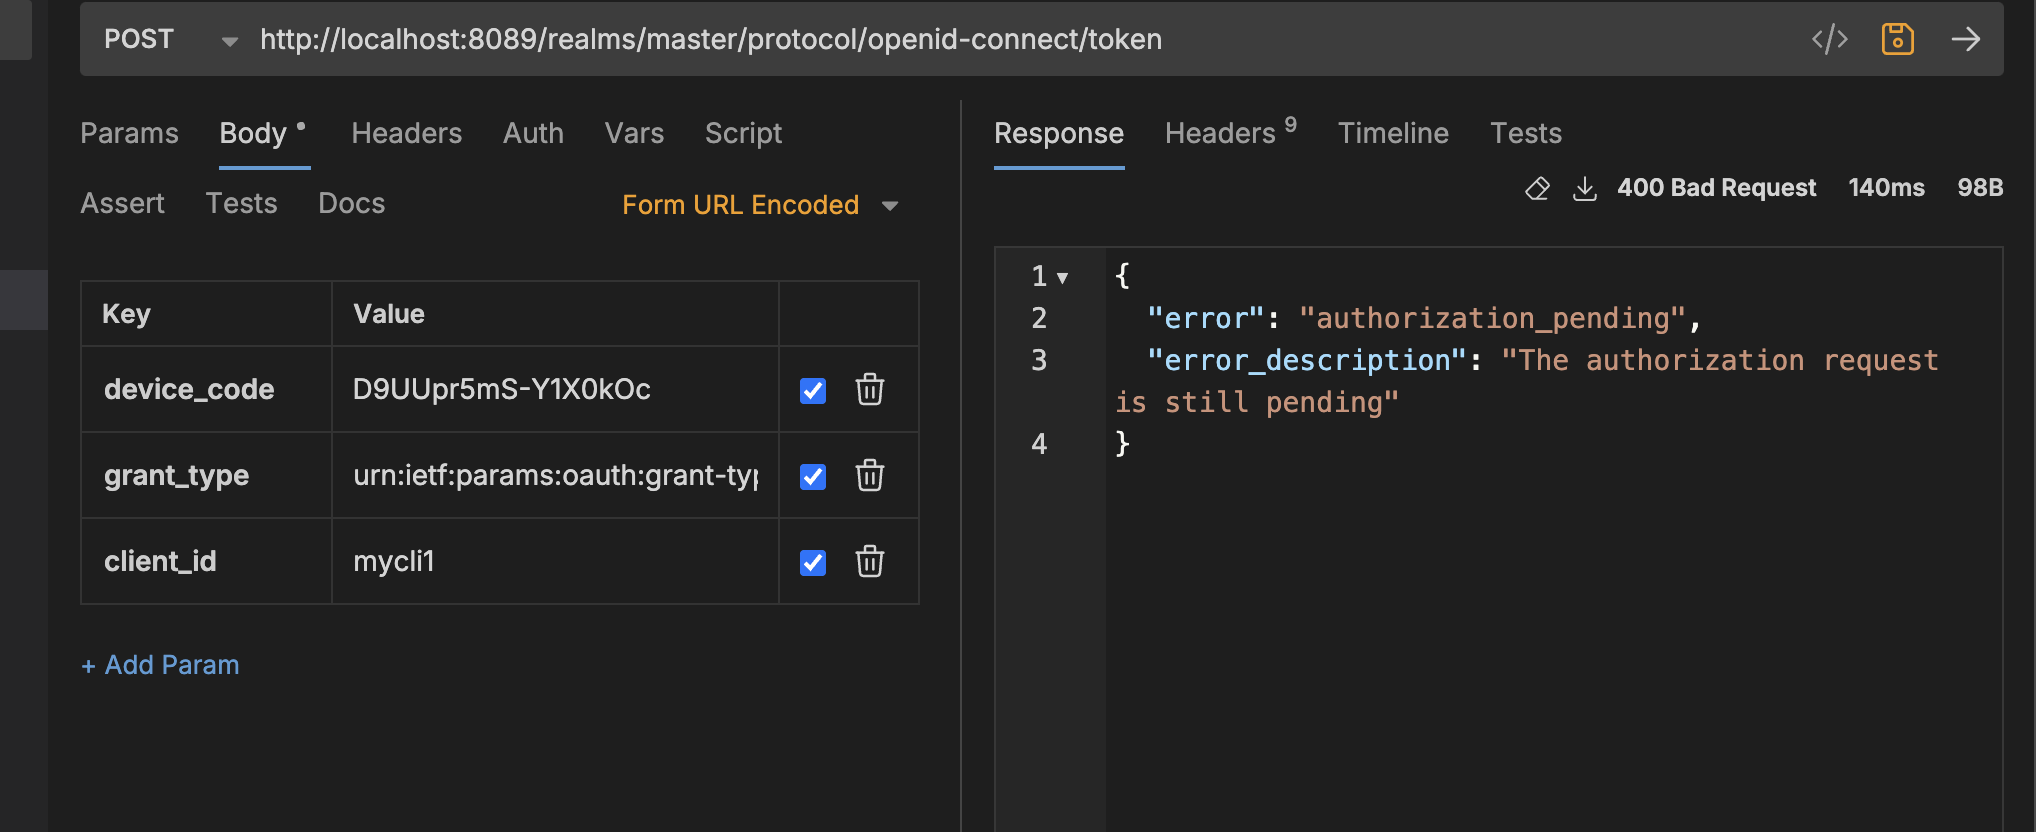
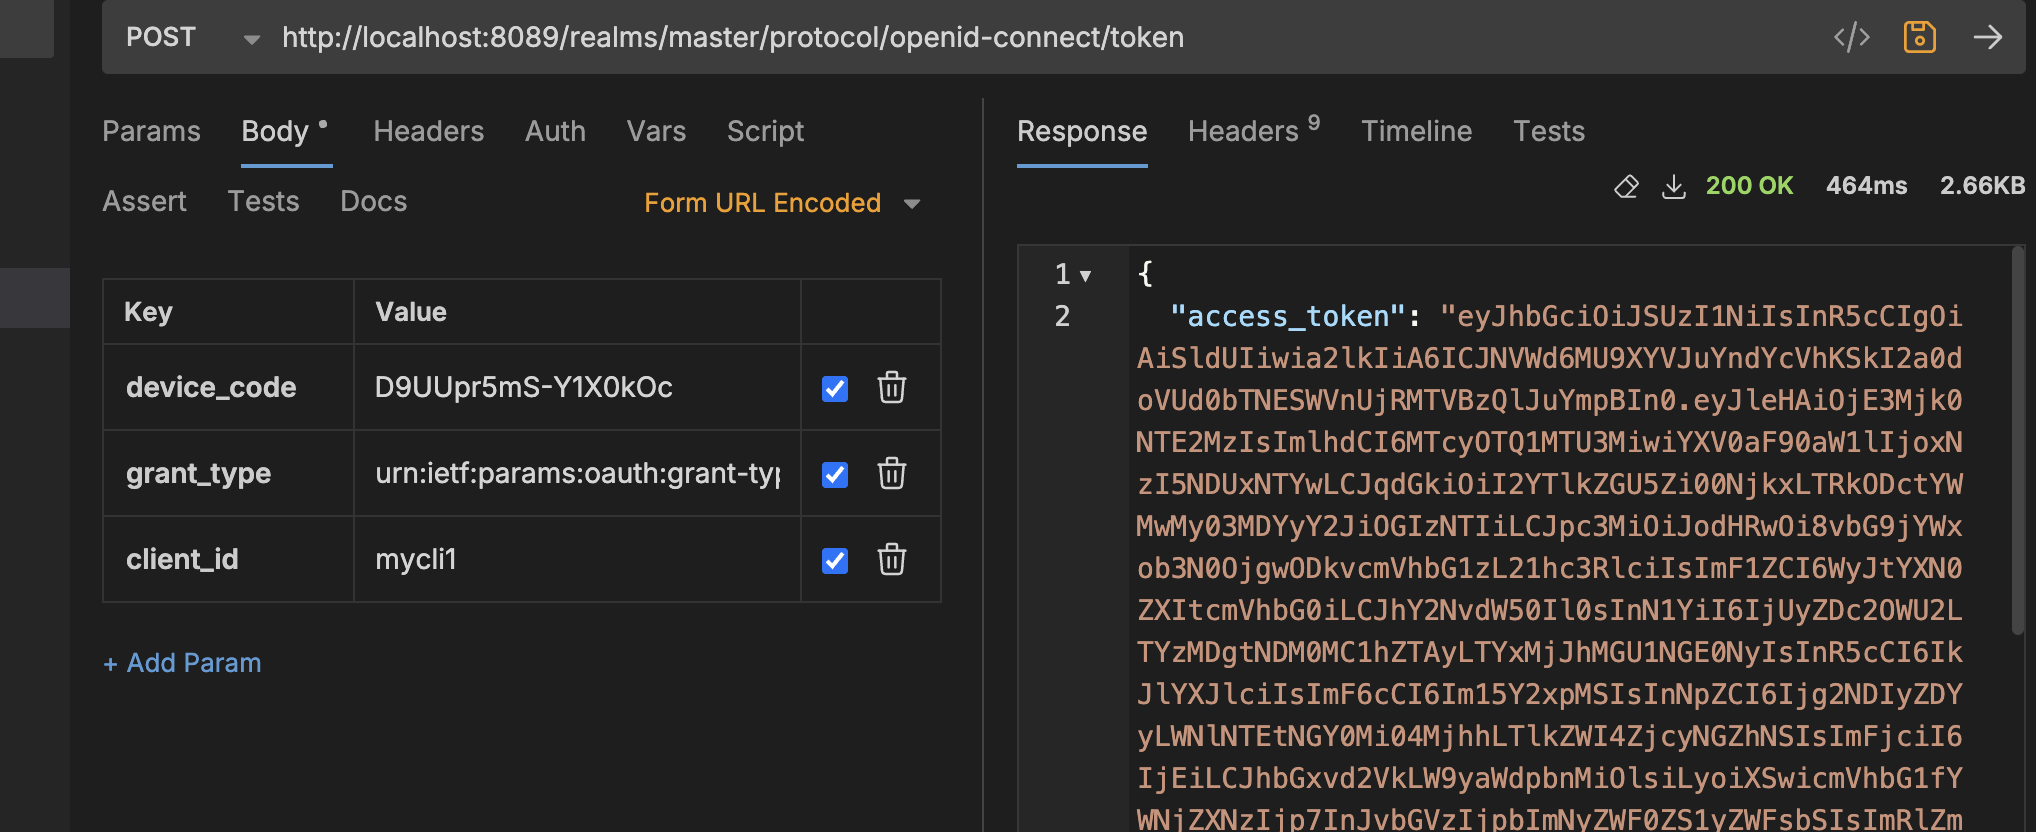
Token Request call
- While the user completes the authentication you can poll for the access token to know the status.
curl --request POST \
  --url http://localhost:8089/realms/master/protocol/openid-connect/token \
  --header 'content-type: application/x-www-form-urlencoded' \
  --data device_code=NySbTxIjqY0tRY_QWxRPEI0wfc9GJ9q7VP7zIEBdL_c \
  --data grant_type=urn:ietf:params:oauth:grant-type:device_code \
  --data client_id=mycli1
when the request is pending:
When the auth is completed by user
Considerations
- If you are using this in real time, make sure to use the
intervaltime provided in thedevice codecall to poll for the token. - RFC doesn’t specify on how to revoke tokens in this flow, but in keycloak you can only make
token revocation,userinfoortoken introspectionwith a client-id and client-secret which are only available if the client you created hasClient authenticationoption enabled, without this you wont be able to access other endpoint. This is something to think about when use this grant type.
Next up i will create a quick go cli that can use this grant type for testing.