Pre-requisites
- Basic knowledge of Terraform.
- Terraform installed.
- Taskfile installed.
- Go installed.
Introduction
Lately, I’ve been spending a lot of time with Terraform to convert manual configurations into Terraform code (configuration as code). One of the providers I used did not support a few flags, so I ended up diving into the project to understand how a provider works. With that knowledge, I set out to write a very simple provider for learning purposes.
What is a Terraform provider?
In Terraform, providers are plugins that enable communication with target systems. For example, the AWS provider allows you to manage AWS resources, and similarly, providers exist for GCP, Azure, and other platforms or products that expose customer-facing APIs. These providers simplify configuration and resource creation in Terraform. Terraform’s goal is to ensure that the state described in your configuration file matches the actual state of the target system, maintaining consistency between the two
Under the hood, a provider is a simple Go executable that implements all the CRUD methods for a given API of the target system. For instance, if you want to create an EC2 instance, you use the AWS API and write the CRUD methods using the Terraform plugin SDK. This allows Terraform to perform necessary actions based on the differences it detects.
Setup
Target system - Article server
To start, I created a small Go server that stores and retrieves articles. You can use the POST /api/v1/article endpoint to create an article and GET /api/v1/article to retrieve it. The schema for an article is as follows:
{
	"id": 3,
	"heading": "Microservices Architecture",
	"description": "An introduction to microservices.",
	"tags": ["Microservices", "Architecture"]
}
You can find the complete code for the article-server on my GitHub.
Build and run it as a Docker container using task build and task run, or run it locally using go run main.go.
Creating the provider
- Create a directory: terraform-provider-article.
- Initialize a Go module: go mod init {any-name-you-like}.
- Create a main.go file.
- Below, I’ll go over the functions that make up this provider, This way you can build a easy mental model of how everything ties together. The full code is available on my GitHub.
package main

import (
	"net/http"
	"github.com/hashicorp/terraform-plugin-sdk/v2/helper/schema"
	"github.com/hashicorp/terraform-plugin-sdk/v2/plugin"
)

// Main entry point to run the provider
func main() {
	// This tells Terraform how to use your provider.
	plugin.Serve(&plugin.ServeOpts{
		ProviderFunc: provider,
	})
}

// Provider function returns the schema for the provider
func provider() *schema.Provider {
	return &schema.Provider{}
}

// Configure function to initialize the provider with target system details like API URL, authentication, etc.
func configure(d *schema.ResourceData) (interface{}, error) {
	// Implementation here
}

// Resource schema for 'article'
// Defines the CRUD methods Terraform uses during plan and apply phases.
// It also specifies the schema for Terraform configurations in `.tf` files.
func resourceArticle() *schema.Resource {
	// Implementation here
}

// Helper function to send HTTP requests
func sendRequest(url string, method string, data interface{}) (*http.Response, error) {
	// Implementation here
}

// CRUD methods
// Resource creation function
func resourceArticleCreate(d *schema.ResourceData, meta interface{}) error {
	// Implementation here
}

// Resource read function
// Called during `terraform plan` and `apply` to verify the resource state.
// If creation succeeds but reading fails, Terraform will treat it as an error.
func resourceArticleRead(d *schema.ResourceData, meta interface{}) error {
	// Implementation here
}

// Resource update function
func resourceArticleUpdate(d *schema.ResourceData, meta interface{}) error {
	// Implementation here
}

// Resource delete function
func resourceArticleDelete(d *schema.ResourceData, meta interface{}) error {
	// Implementation here
}
Build the provider
- Ensure you name the provider as terraform-provider-{name} (e.g., terraform-provider-article) to allow Terraform to locate and execute the binary.
- Build the provider using go build -o terraform-provider-article.
- Verify the binary is created. This is what Terraform uses when the provider is specified in a .tf file.
- The plugin.Serve function starts the provider server and handles requests from Terraform. This architecture ensures Terraform remains functional even if the provider fails.
Using the provider
Provider configuration
Update or create a ~/.terraformrc file with dev_overrides. Ensure the path points to the absolute location of your provider binary. This configuration tells Terraform where to find the provider executable when you use the article provider. hcl
provider_installation {
  dev_overrides {
    "article" = "/Users/{home}/github/terraform-article-provider/terraform-provider-article/"
  }
  direct {}
}
Terraform code structure
Terraform configurations typically consist of three key blocks:
- Terraform block: Specifies the providers to use.
- Provider configuration: Supplies connection details like API URL and authentication.
- Resource blocks: Define the resources (e.g., articles) and their configurations.
here is code described in comments
# Terraform block: Defines the required providers and their sources.
# The "article" provider is configured to use the source "article", which corresponds
# to the dev_override setting in your .terraformrc file. This tells Terraform where to
# locate the provider binary.
terraform {
  required_providers {
    article = {
      source = "article" # This should match the dev_overrides in .terraformrc
    }
  }
}

# Provider configuration block: Configures the "article" provider.
# The "url" parameter specifies the base URL of the target system that the provider
# will interact with. In this case, it's pointing to a local server running on port 9999.
provider "article" {
  url = "http://localhost:9999"
}

# Resource block for creating the first article.
# The "article" resource uses the "article" provider to create a new article.
# - "heading" specifies the title of the article.
# - "description" provides details about the article.
# - "tags" assigns a list of tags to categorize the article.
resource "article" "test_article" {
  heading = "My Second Article"
  description = "This is an article created by Terraform"
  tags = ["Terraform", "API", "Article"]
}

# Resource block for creating a second article.
# Similar to the first article, this block creates another article with a unique heading,
# description, and set of tags.
resource "article" "test2_article" {
  heading = "My Thrid Article"
  description = "This is an article created by Terraform (second)"
  tags = ["Terraform"]
}
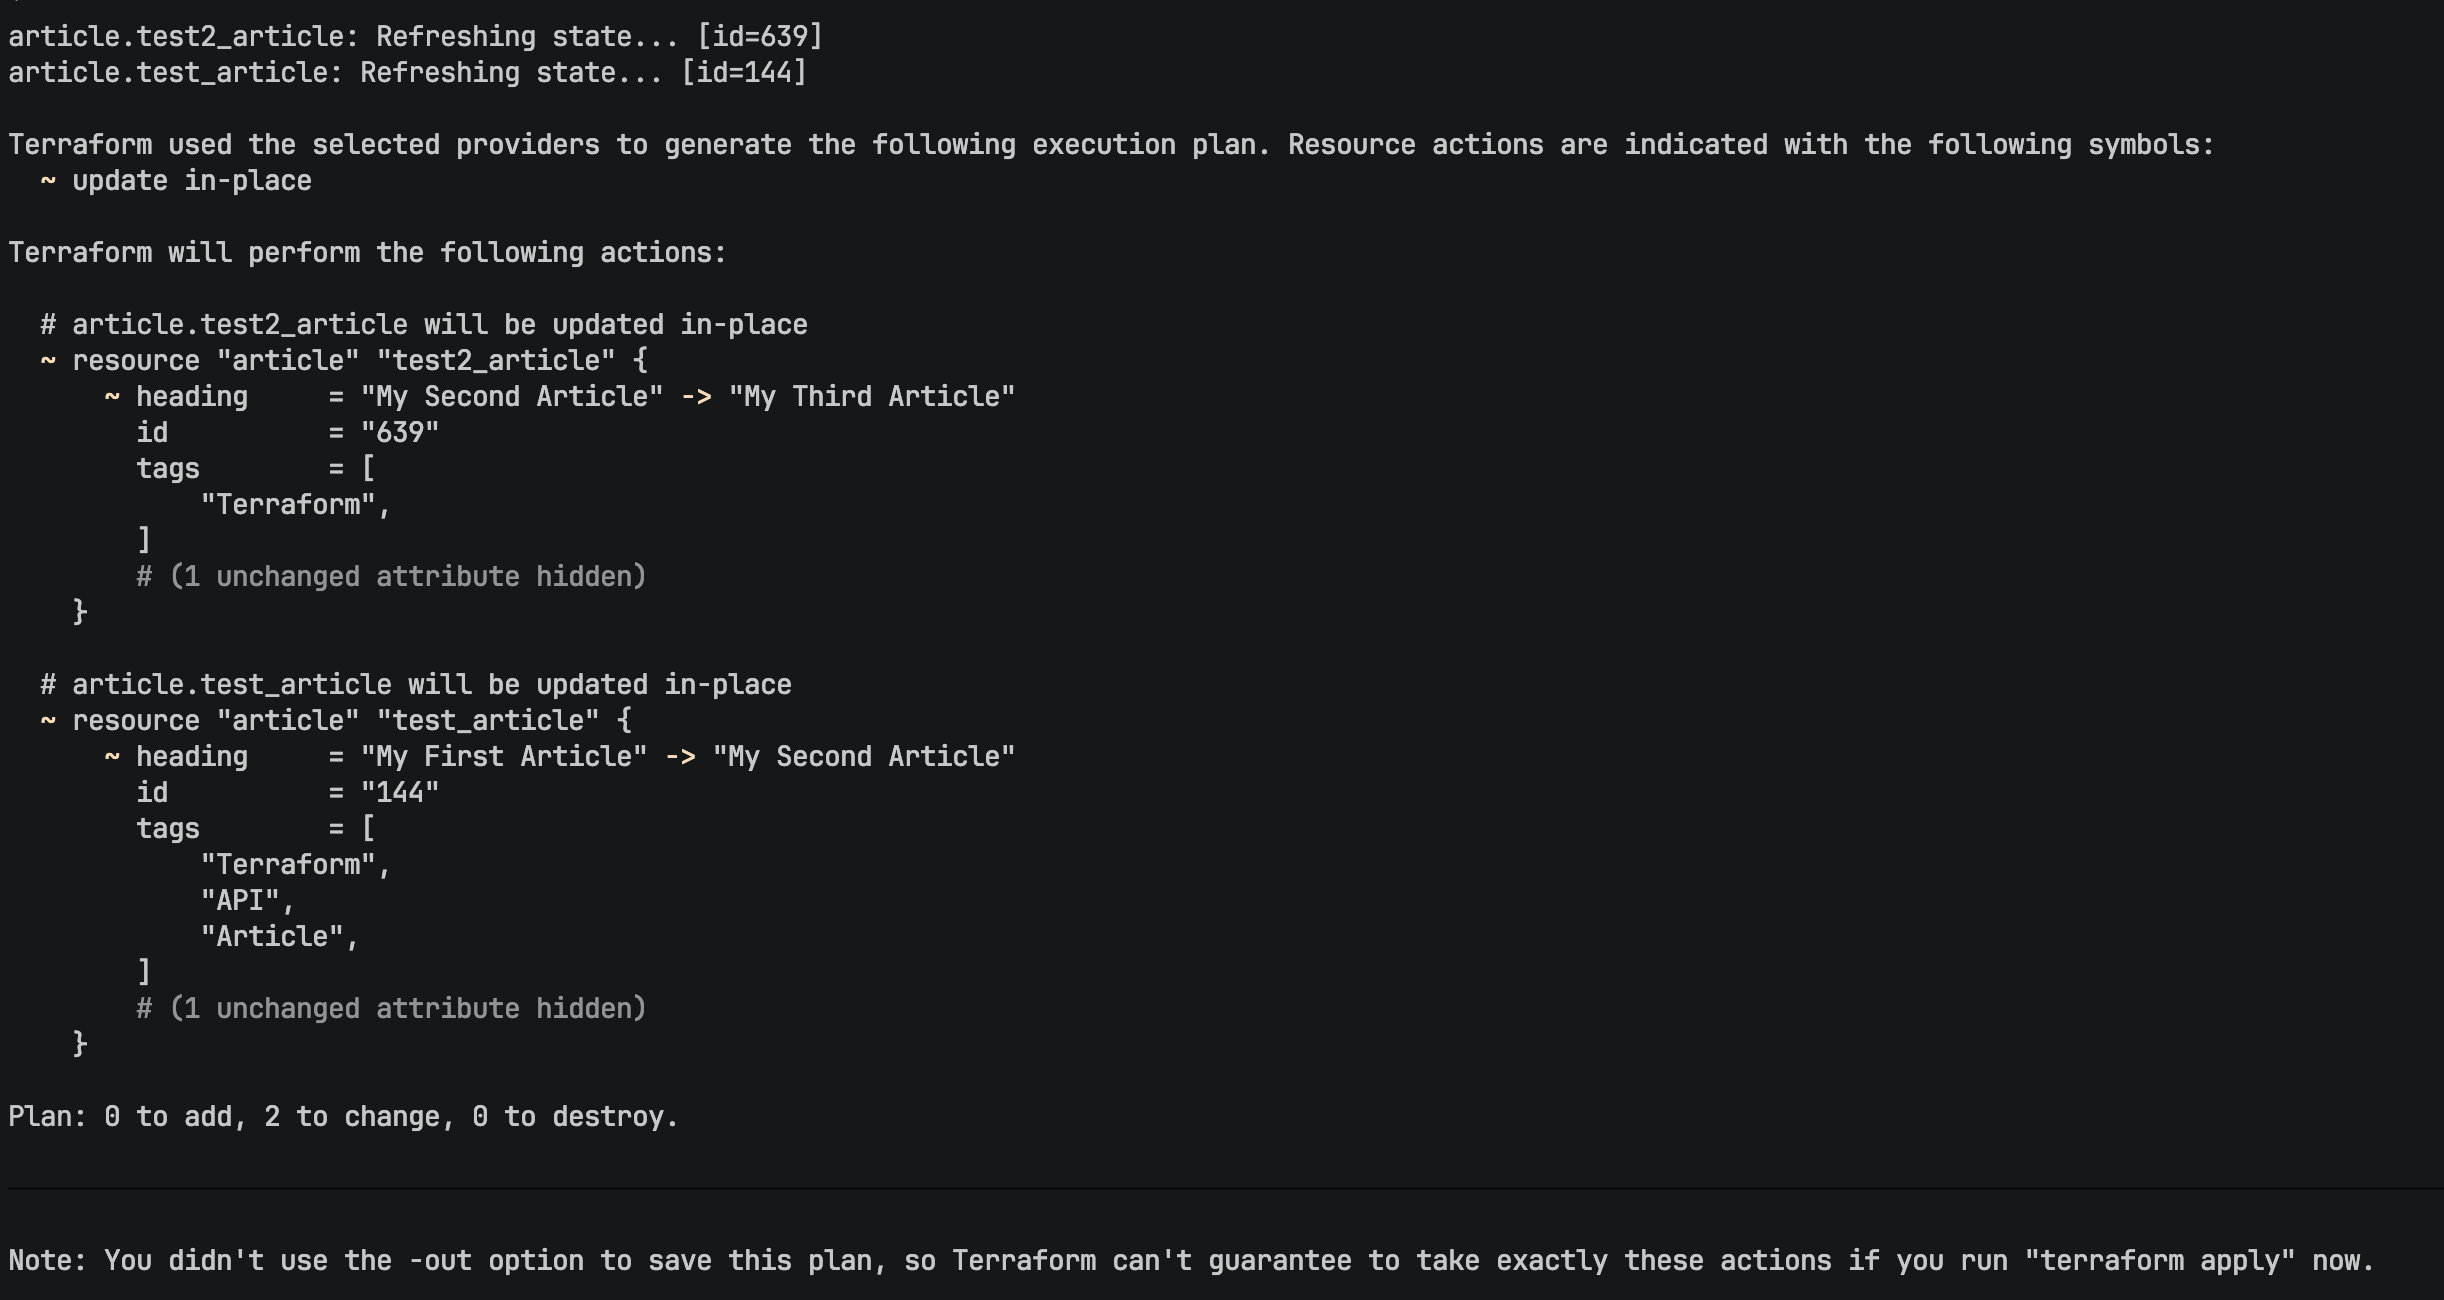
Now we are ready to do terraform plan since we are using dev_overrides we don’t have do terraform init.
terraform plan

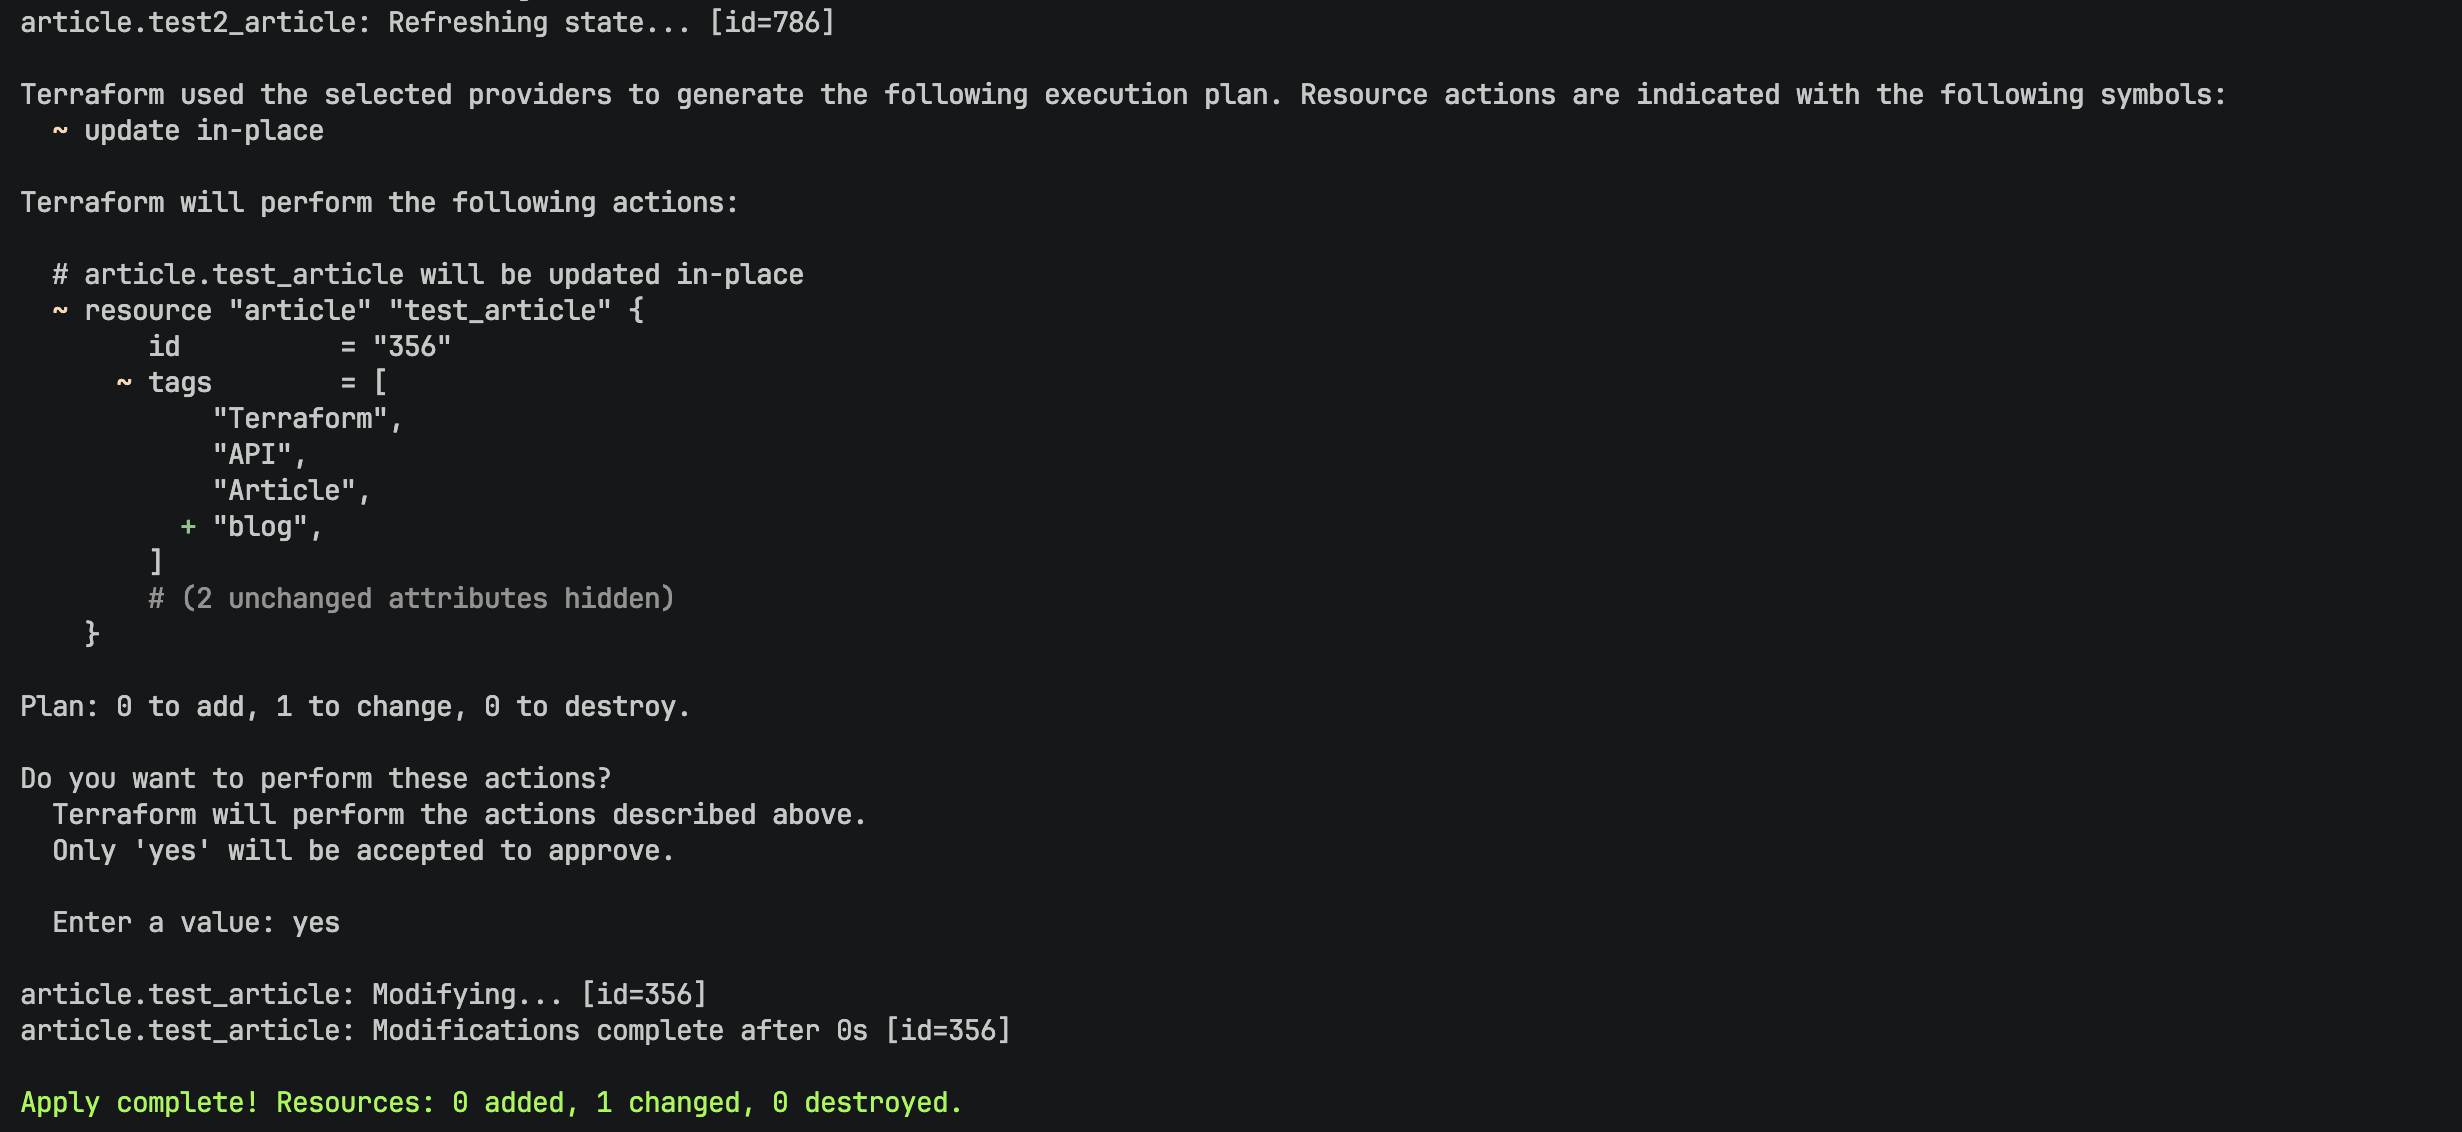
terraform apply

article server test
